FAQ Use this menu to find answers to your questions easily!
Before you start
If you want to create your book in only a few minutes, we recommend to make modifications on your social network or blog before importing it!
Make sure that all the content that you want to see in your blook is available (not unmasked nor archived. For blogs, make sure that your blog / contents are public at least during the import (it will only be for a few minutes!);
Make sure to correct typos or spelling mistakes on the proper platform, because corrections won't be possible for the following blooks: Top 100 Twitter, Top 100 Instagram, Top 100 Facebook and Tumblr book;
For blogs: Make sure that your articles are correctly categorized and dated;
Make sure that your images are still present in your articles (ideally check that the source link is still properly hosted), and that they are of good quality (ideally more than 1000*1000 pixels originally);
Don't forget to add new images from your blog interface, because it won't be possible to insert them after the creation of your blook!
Once you've check that all the changes recommended in the previous question are done, BlookUp will import and automatically format your content in just a few seconds!
You have to create an account to be able to save your project safely in your personal account and come back to it when you have more time!
A blook that hasn't been ordered is automatically and definitively deleted after 1 months (30 days). By modifying it, the 1 months period will be reseted on the same day the modifications are made.
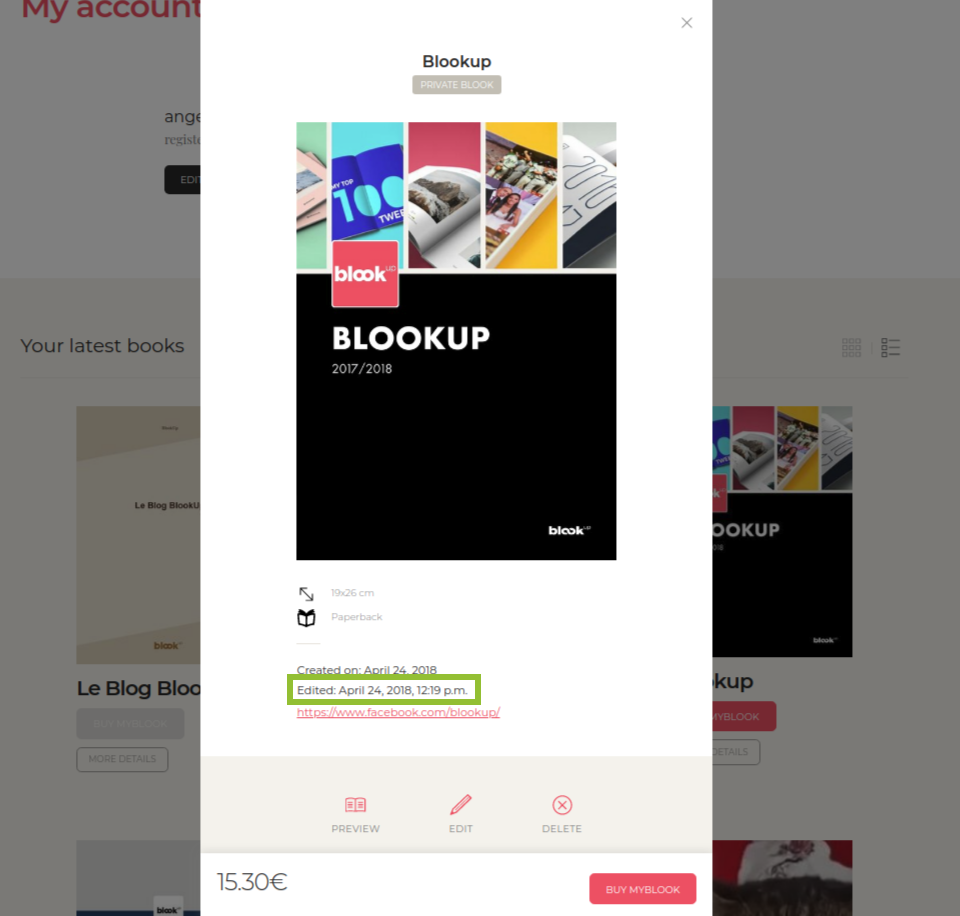
Click here to see where you can find the date of your last blook modification in your account! A blook that has been ordered at least once is automatically and definitively deleted after 6 month. If you order it again, the 6 month period will be reseted on the same day the new order is placed.
You will recieve an automated E-mail 7 days before the removal of your blook, which will allow you to come back on our website in order to modify or re-order it, avoiding its disappearance ;)
If you want to know more about blooks storage, check out our Terms and Conditions of Use!
Pricing, shipping and quality
Our online tool shows the exact price in real time of all the blooks by automatically taking into account various settings (like the number and length of the publications and images, the blook's format, the chosen options...). It is impossible for our team to estimate a price in advance, this is why we invite you to create a blook preview for free and test all the available options!
Fixed-priced Blooks (Top 100)
-
Top 100 Twitter (€19 - $22 USD)
-
Top 100 Instagram (€22 - $25 USD)
-
Top 100 Facebook (25€ - $29 USD)
Pricing examples for 100 pages (other blooks)
| BOOK | FORMAT | PRICE |
|---|---|---|
| Blog book | 15 x 21 cm 5.9 x 8.3 in. |
22,66€ ($25.75 USD) |
| PDF book | 14,8 x 21 cm (A5) 5.8 x 8.3 in. (A5) |
22,66€ ($25.75 USD) |
| "Classic" Instagram | 20x20 cm 7.9 x 7.9 in. |
22,66€ ($25.75 USD) |
| Blog album | 20 x 27 cm 7.9 x 10.6 in. |
36,05€ ($41.71 USD) |
| PDF album | 21 x 29,7 cm (A4) 8.3 x 11.7 in. (A4) |
36,05€ ($41.71 USD) |
| Tumblr book | 26 x 20 cm horizontal 10.2 x 7.9 in. horizontal |
36,05€ ($41.71 USD) |
| Facebook book (profile or page) |
19 x 26 cm 7.5 x 10.2 in. |
36,05€ ($41.71 USD) |
Shipping Fees
France: 5€ (- de 30€) et 10€ (+ de 30€)
Europe et reste du monde : 12€(- de 30€) et 15€ (+ de 30€)
*price may vary depending on the current dollar value
Decreasing prices (multiple copies of the same book)
| 1 to 10 copies | / |
|---|---|
| 11 to 25 copies | 15% off |
| 26 to 50 copies | 20% off |
| 51 copies and more | 25% off |
Contact our customer service to know more about it, depending on your project!
A minimum order of €150 ($185) has to be placed to be able to pay without a credit card (for companies and public partners only)
| REGION, COUNTRY | MAXIMUM DELAY | |
|---|---|---|
| Metropolitan France, Belgium, Luxembourg, Germany | 10 working days |
|
| Rest of Europe | 12 working days* |
|
| North America (USA & Canada) | 15 working days* |
|
| DOM-TOM/ Africa / Asia / Latin America / Oceania / Worldwide | 18 working days* |
*Delivery times for some areas inside these destinations may vary from 24h or more
The tracking number will be automatically sent to you by email, or can be found in your order recap. Delays are estimated according to:
The time required to produce the book, (3-4 days for softcover books, 4-5 for hardcover books)
Transit time depending on the shipping method (from 48h to 72h on average for Colissimo and DHL) and on the possible waiting time in customs
Working days do not take into account weekends and public holidays.
The price of our books depends on their number of pages, and therefore, all the modifications aiming to reduce or increase the number of contents will have an impact on the price of your blook. Amongst these modifications, you'll find:
Choosing a smaller or larger book (Blog Book or Album, PDF Book or Album). Warning! Changing format means that you import your blog or PDF again to create a new blook!
Reducing or increasing the publication period covered by your blook;
Including or excluding posts, individually (all blooks) or by content type (Facebook, Tumblr);
Adding or deleting text or deleting images in a publication (Blogs, Facebook);
Enlarge or reduce text and images size (Blogs);
Enable or disable options like page breaks after each article, displaying the table of content... (Blogs).
BlookUp ensures to retrieve the better photo quality made available by you on your platform and to choose a printing house providing a great printing quality; However, differences may appear between photos on screen and on paper. Here are a few tips to help you anticipate the result of your printed photos:
-
You can modify your photos via an image editing software in order to get closer to your printing expectations and/or directly recalibrate your screen in order to ensure that the rendering of your images on screen is the closest to the result on paper. Nevertheless, these modifications are subject to the variations advanced in point 2.
-
A color distortion can happen when the image goes from RGB format (calibrated for optimized web use) to CMYK format used for paper printing.The last time the machines were cleaned, the change of ink toners (colors), the moment when the blook is printed, etc... may also affect the rendering of a book, even printed several times. These rendering differences are ascribable to actual printing processes, all printing houses, printing machines and printing techniques combined.
-
BlookUp ensures that your images are highlighted by giving them the most room possible on paper. It is therefore necessary to make sure on your end that you possess large, high-definition pictures on your social network or blog in order to secure a maximum printing quality!
Data Import
To create your blook, the content you want to transform into a book has to be from one of our compatible platforms and files:
| BLOGS | SOCIAL NETWORKS | FILES |
|---|---|---|
|
|
|
|
If it isn't the case, the only solution you have is to copy/paste your content into a specialized software (Word, OpenOffice, InDesign...), format it as you like and, once your document is ready, convert it into a PDF file. Some online tools such as DocumentCyborg can help you convert the web pages into text documents or .PDF to gain some time, and other websites can help you gather all your PDF documents into one: you will then be able to import your PDF to BlookUp and print your 100% customized book!
In order to turn a social media or blog into a book, it is required to be able to connect to the account you want to import, both from a technical and a security perspective. Be aware that those are sensible data that we do not recommend sharing.
When the social network and blogging platforms' application interfaces (API) allows it, BlookUp will only ask for reading permissions in order to accomplish the import and transformation of your content. However, it may happen that the API also requires that BlookUp asks for writing permissions to create your book.
BlookUp undertakes to never use the later authorizations, in compliance with its Terms and Conditions of Use.
If you have already made these verifications or if you're not concerned by them, please feel free to contact our customer service!
| GENERAL | All platforms can affected by temporary bugs and generally, you just have to try importing again later! ;) |
|---|---|
The API limits the number of requests that we can do in a sliding window of about 1 hour. If you can not access Facebook authentication, simply wait before retrying your import! |
|
the API limits the import to 5,000 posts/hour for a signle open Instagram session: Before you try to import your content again, first sign out of Instagram, then sign back in again and try creating a new blook. |
|
| WORDPRESS | Check your blog URL: Only a public and complete link (for example https://www.blookup.com/en/blog/) can work. Then, verify that the blog credentials (username and/or e-mail, password) are correct (active account and/or linked to the right blog)! Beware! A few things must be checked to ensure a safe import: More information about this can be found in this Wordpress Import Guide! |
| BLOGGER | Blogger belongs to Google: Our website will automatically connect you to Blogger with the Gmail account to which you are currenty connected to and may not find an associated blog. Please make sure you linked your Blogger account to your Gmail e-mail address! Make sure that your Blogger blog's feed is activated by going to your Blogger administration panel, in "settings", "other", "allow blog feed" and choose "full" as an option. Save the changes and you will be able to create your blook! 
|
BlookUp temporarly connects to your social network or blog and only import the content that is available at that moment. After that, we do not communicate with the chosen platform anymore; If you modify or add content, you'll have to start again, import and create a new blook!
Customizing my book - General
BlookUp gives you an automated layouting tool that will take care of your social network or blog's content. Depending on the blook you chose, you will be able to freely select the content you want to see in your book and/or customize the covers.
Our team will not be a substitute for you to assemble your book but please know that our customer service is here to help you if you have any questions or if you are experiencing technical difficulties during the creation of your book!
your blook is independent from your blog or social network, so you can edit your blook without worrying about messing up your original content!
For now, our online tool only supports latin alphabet. In order to create your blook or retrieve content from a social network or blog containing another alphabet, you can create a PDF in accordance with the method described in the question: "I can't find my platform on your website, what can I do?"
Blooks have to be at least 24 pages long and are limited to 400 pages (300 pages for Instagram and Twitter books).
THE BLOOK IS TOO LARGE:
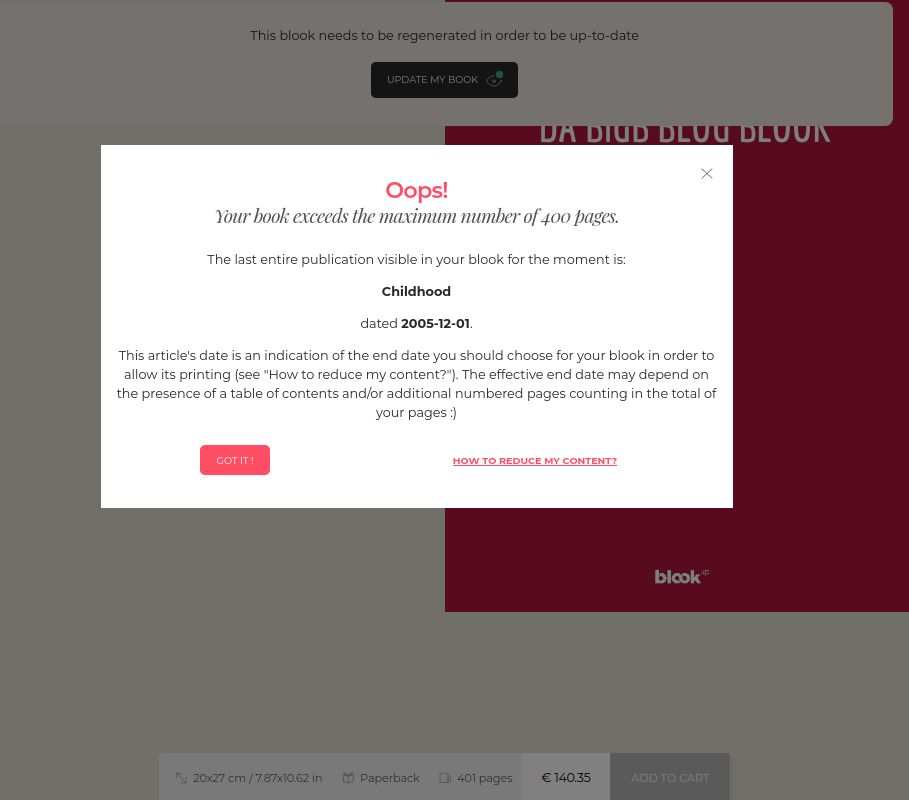
The order button will be grayed out. A message telling you the title and date of the last fully visible post in your blook will open, and a video tutorial will help you reduce your blook based on this post. As long as the message appears, it means you have to exclude more content. Attention! The table of contents counts in the total of your pages, so exclude more content again if you wish to include it ;)
-
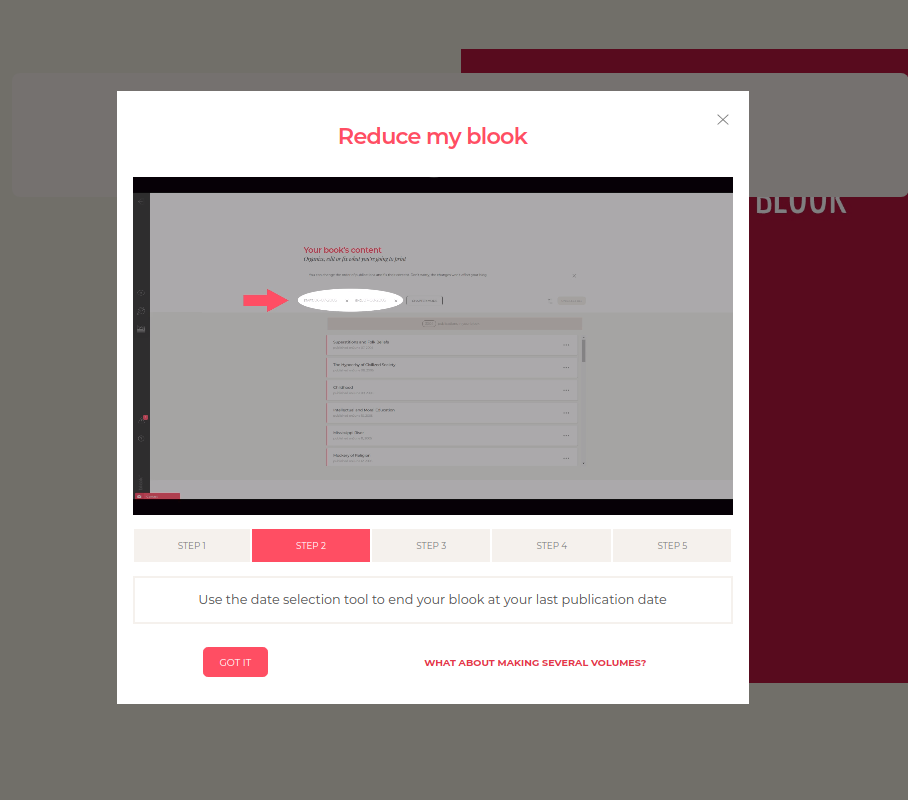
Click on the icon
 to go to your content selection and use the date selection tool to stop the book at the date of the last publication indicated by the help message.
 -
For blogs, manually unselect more content by clicking on the "exclude" button
 displayed when placing your mouse cursor over an article. For Instagram, Facebook and Tumblr, you just need to click on a publication to deactivate it;
-
Regenerate you blook's preview by clicking on the icon
 and check that all the contents you want are fully displayed in the book. If your blook contains 400 pages or less, the ""Buy my Blook"" button will be active again and you'll be able to put the book in your cart ;
-
MAKING SEVERAL VOLUMES: Import your blog or social media again and choose a publication interval which will begin after the last publication of the first book, and so on!
THE BLOOK IS TOO SHORT:
Only one solution here: Create more content before reimporting your social network or blog!
Customizing my book - Blogs
A blog blook can be either a Blog Book (15x21cm) or a Blog Album (format 20x27cm). Be aware that the format choice is definitive! If you want to change it aftewards, you will have to start your blook again from scratch. Choose wisely! ;)
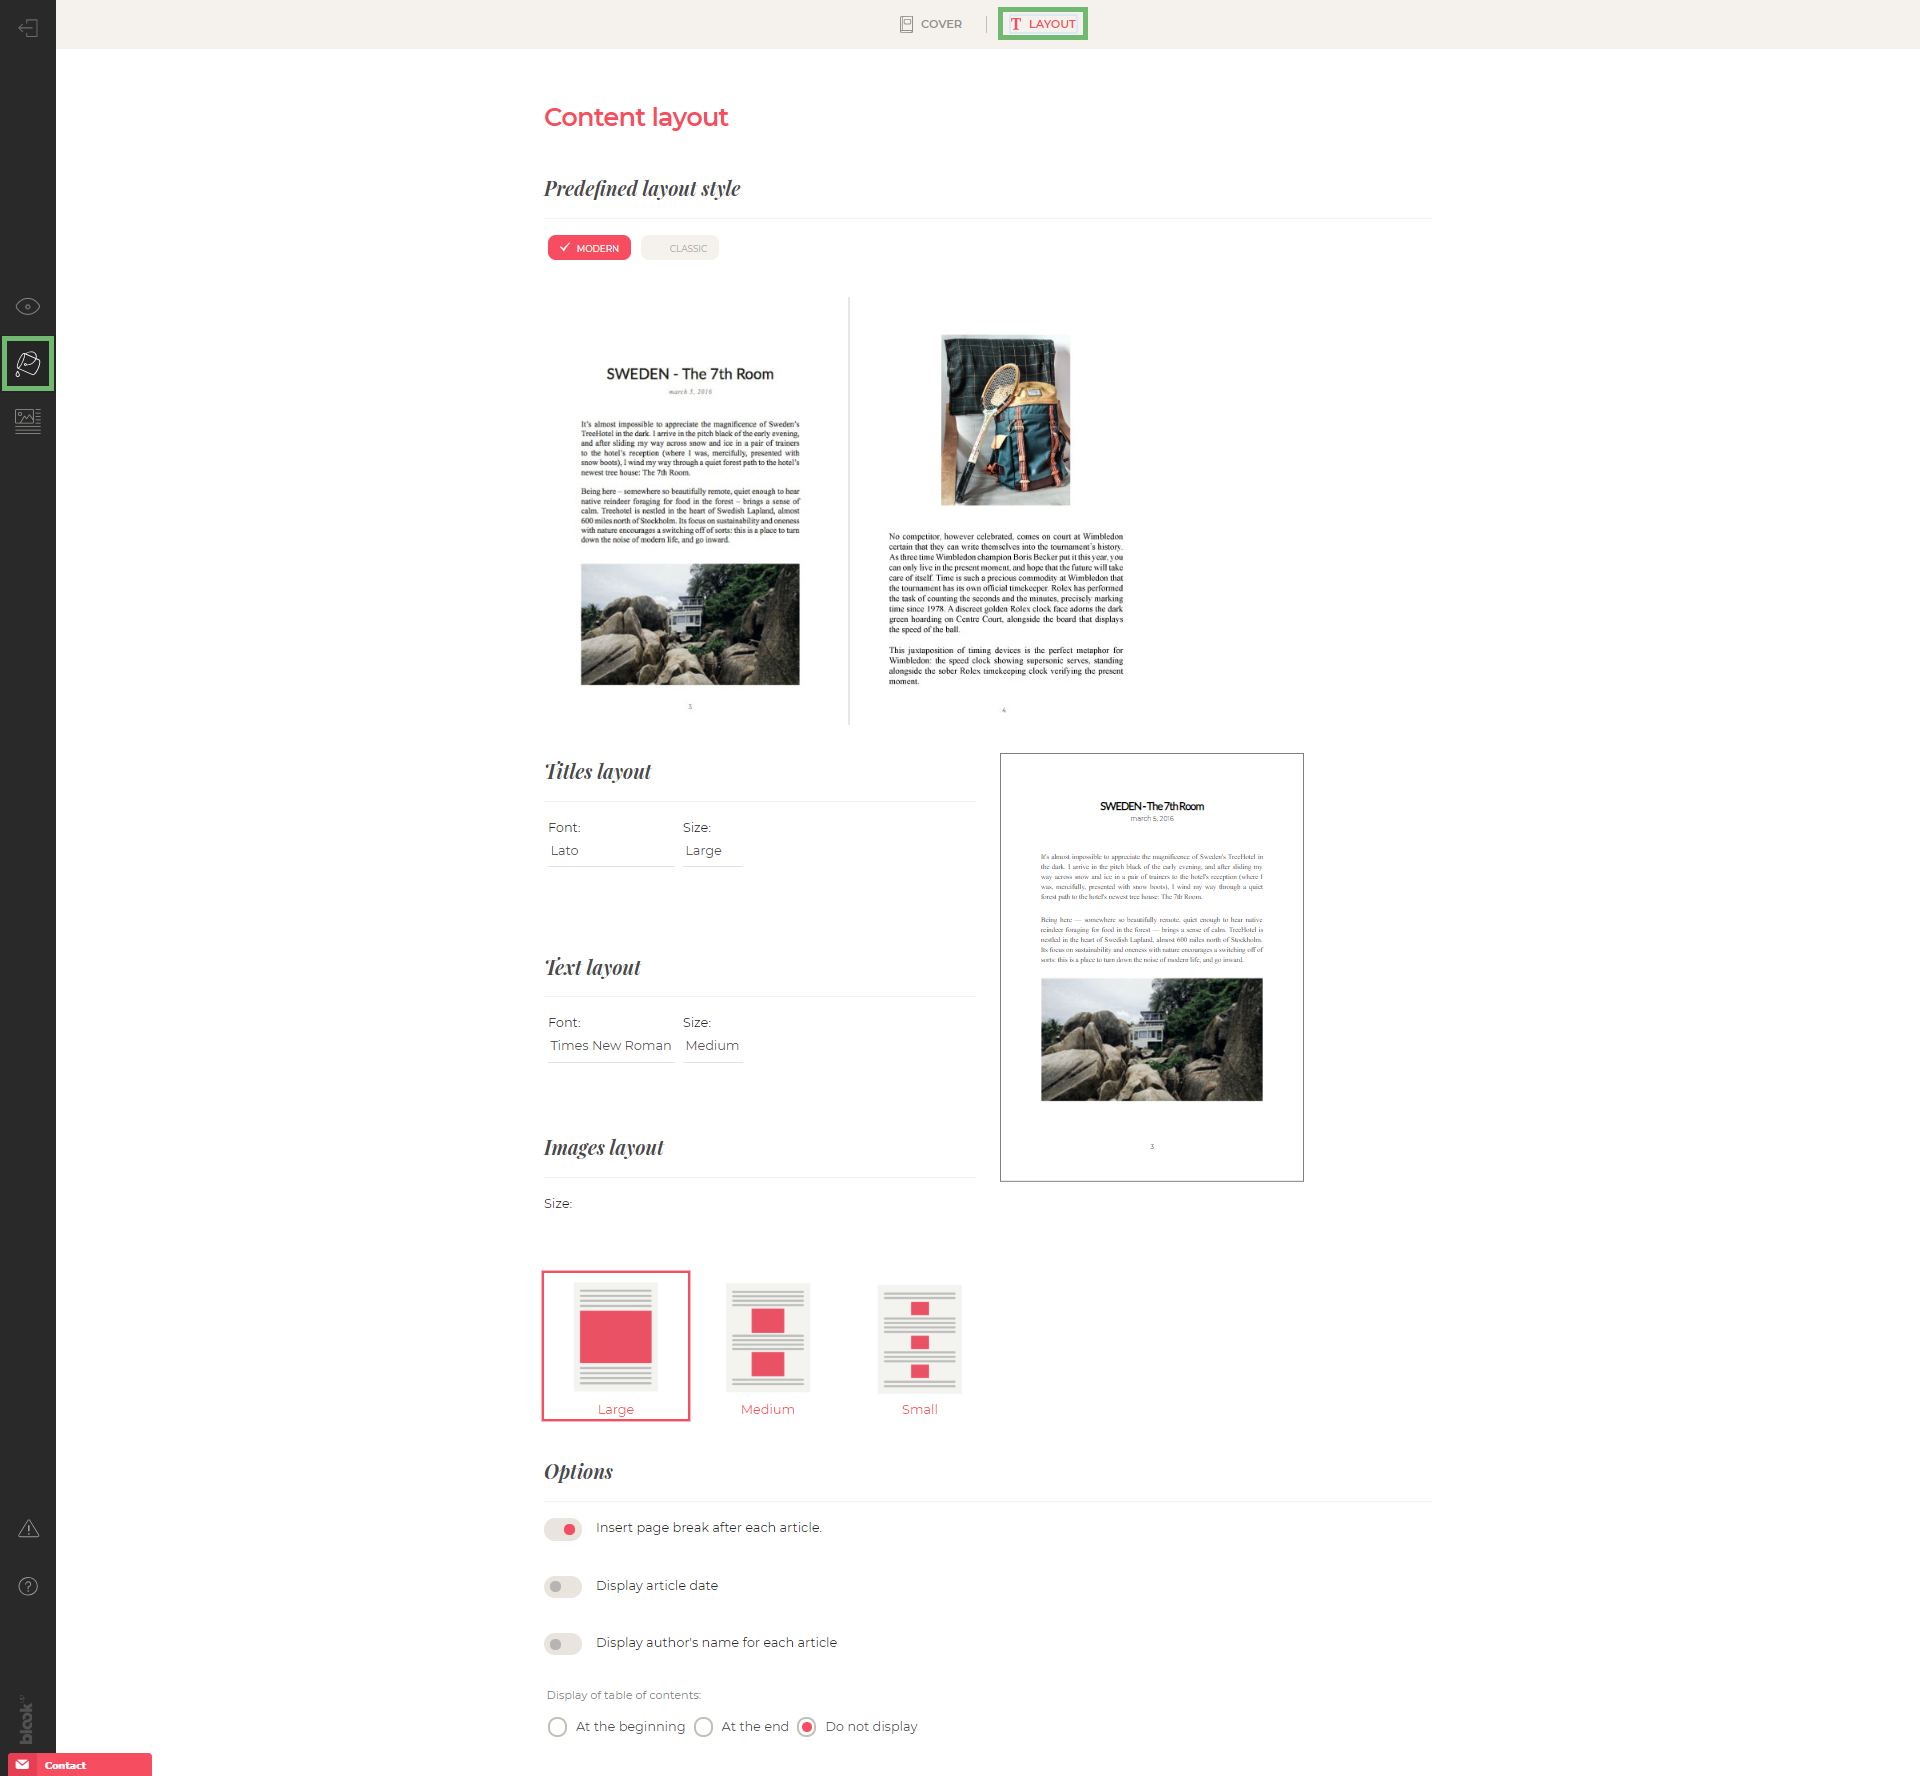
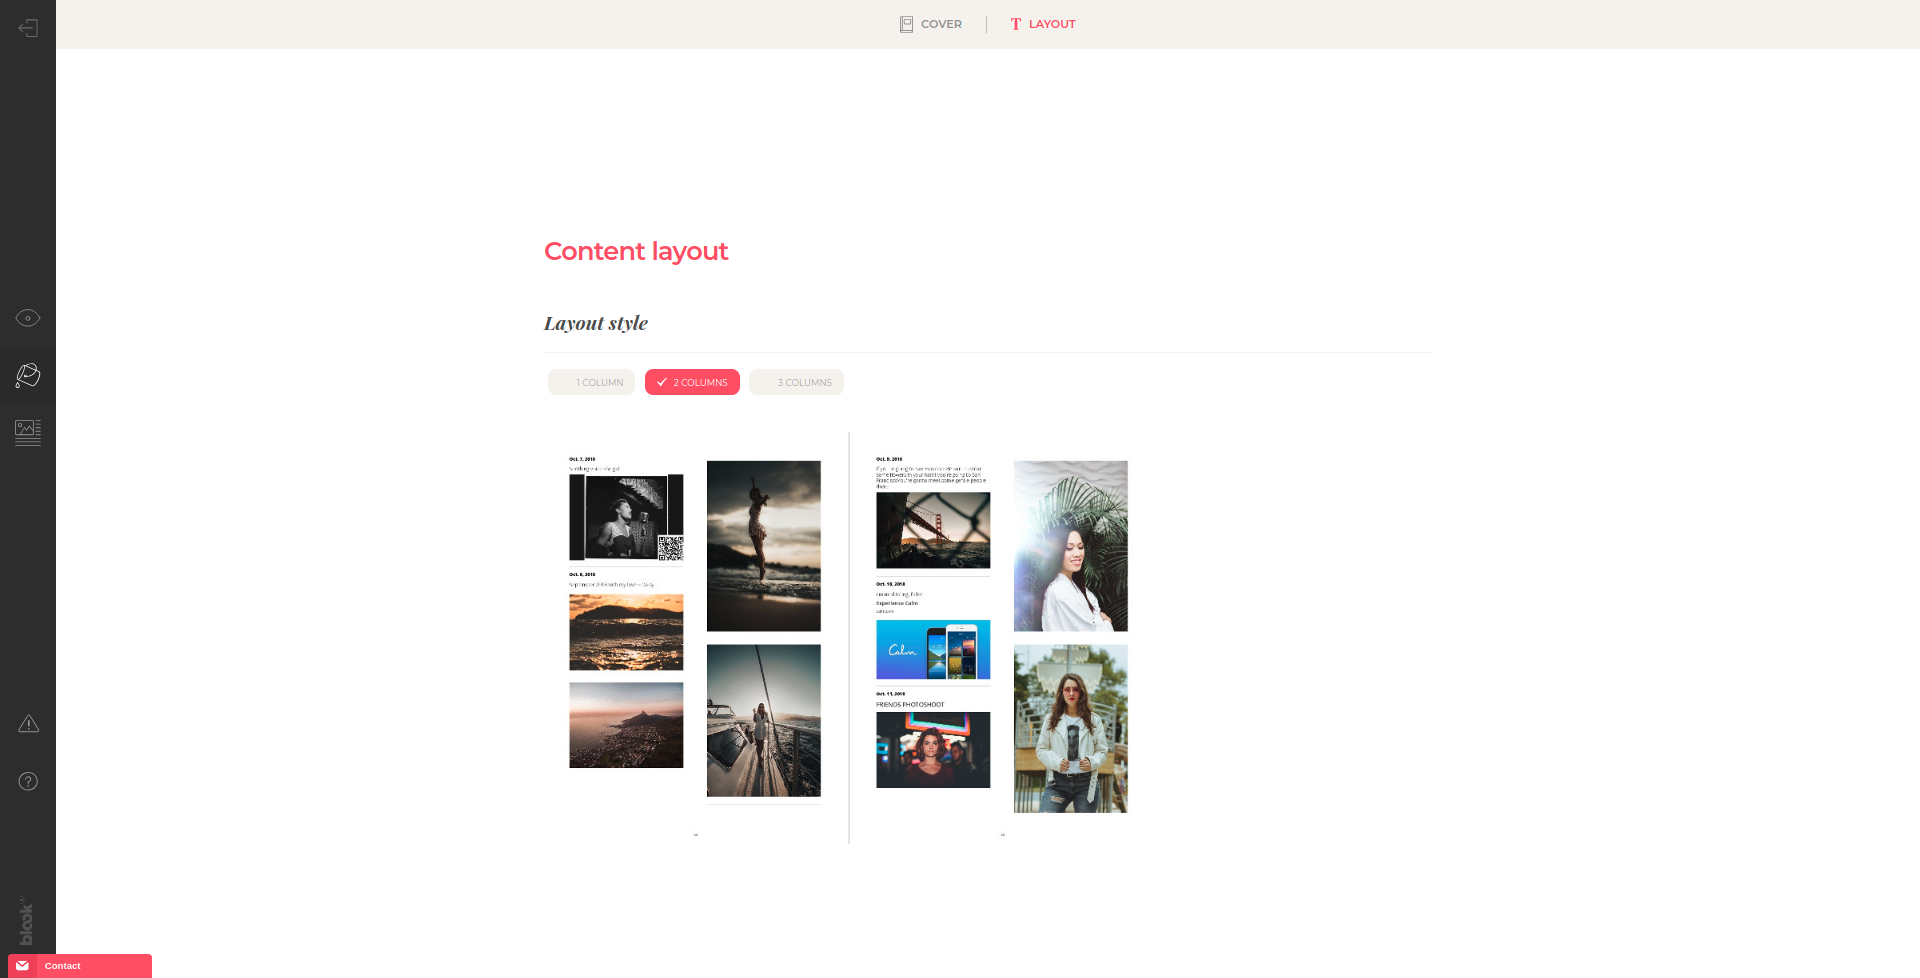
The "Layout" of our editing tool will allow you to easily:
-
Choose a predefined layout style for the inner part of your book.
-
Customize your layout by choosing a font and size for your titles and text, as well as a size for your images! This choice applies to the entiere blook:)
-
Enable or disable page breaks after each article, displaying the date and author of your articles.
-
Choose the position of your table of contents, or choose not to display it.
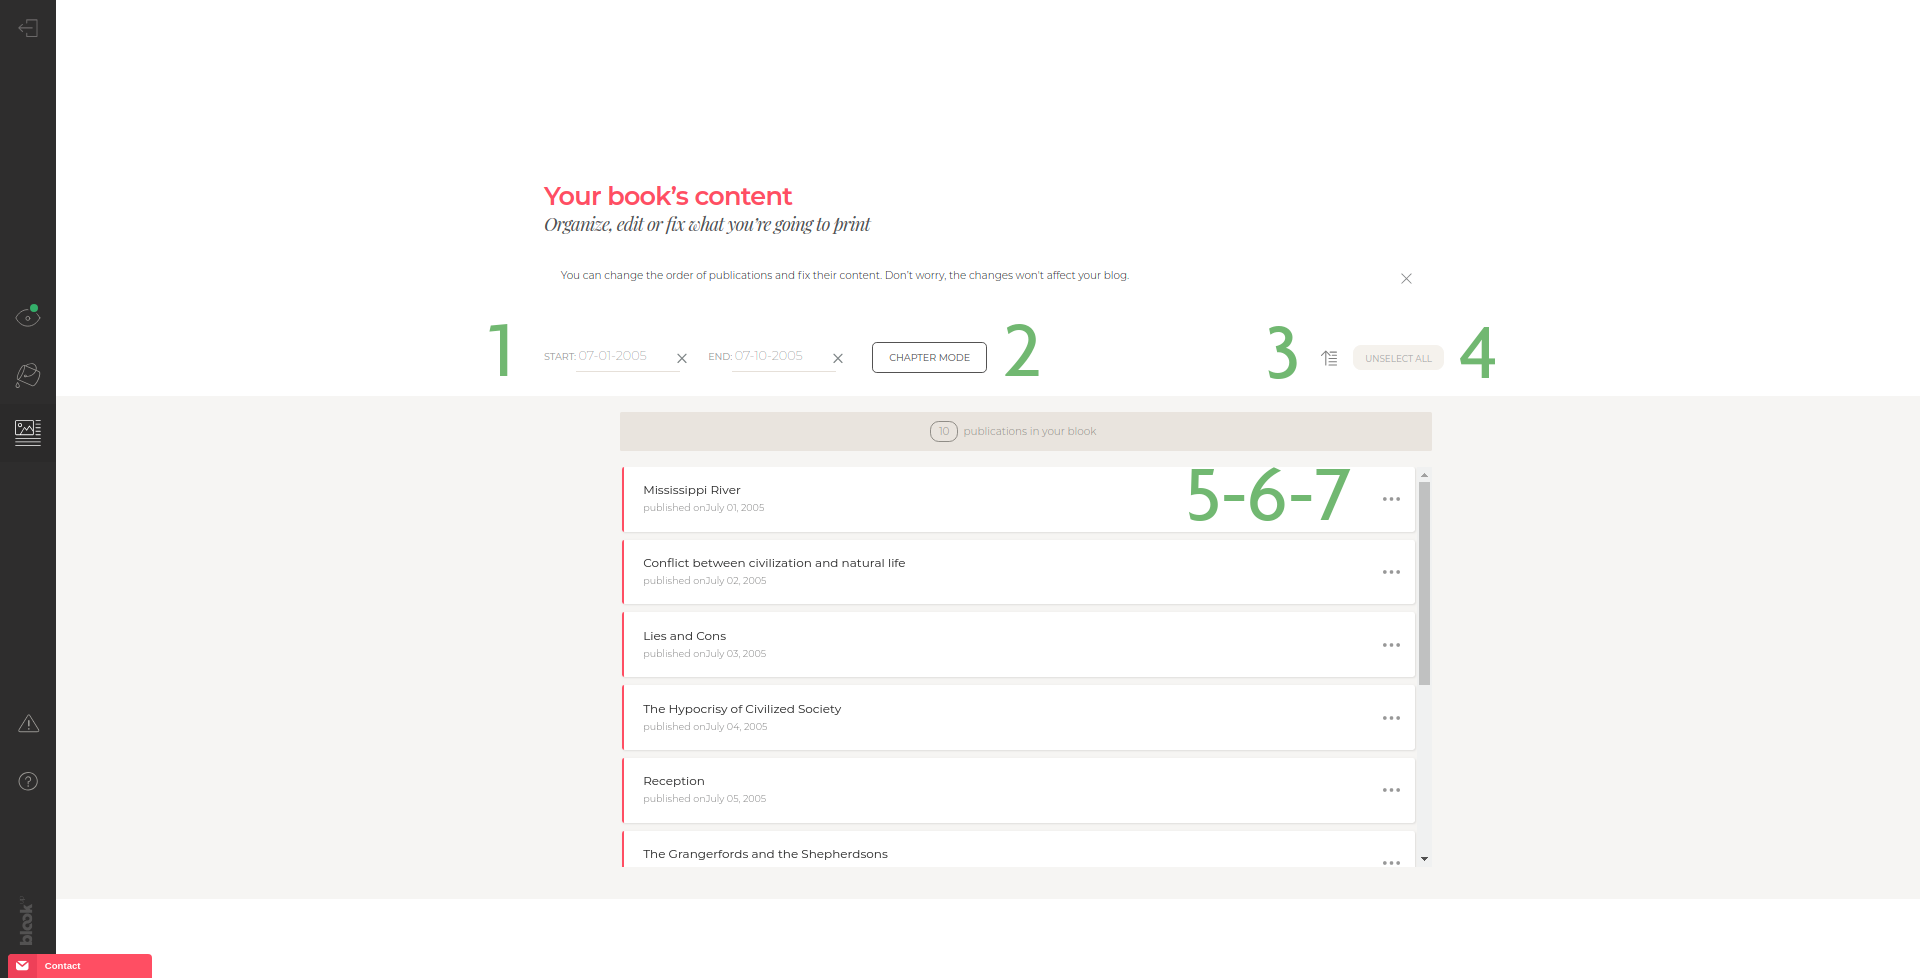
The "Edit your content" window will allow you to:
-
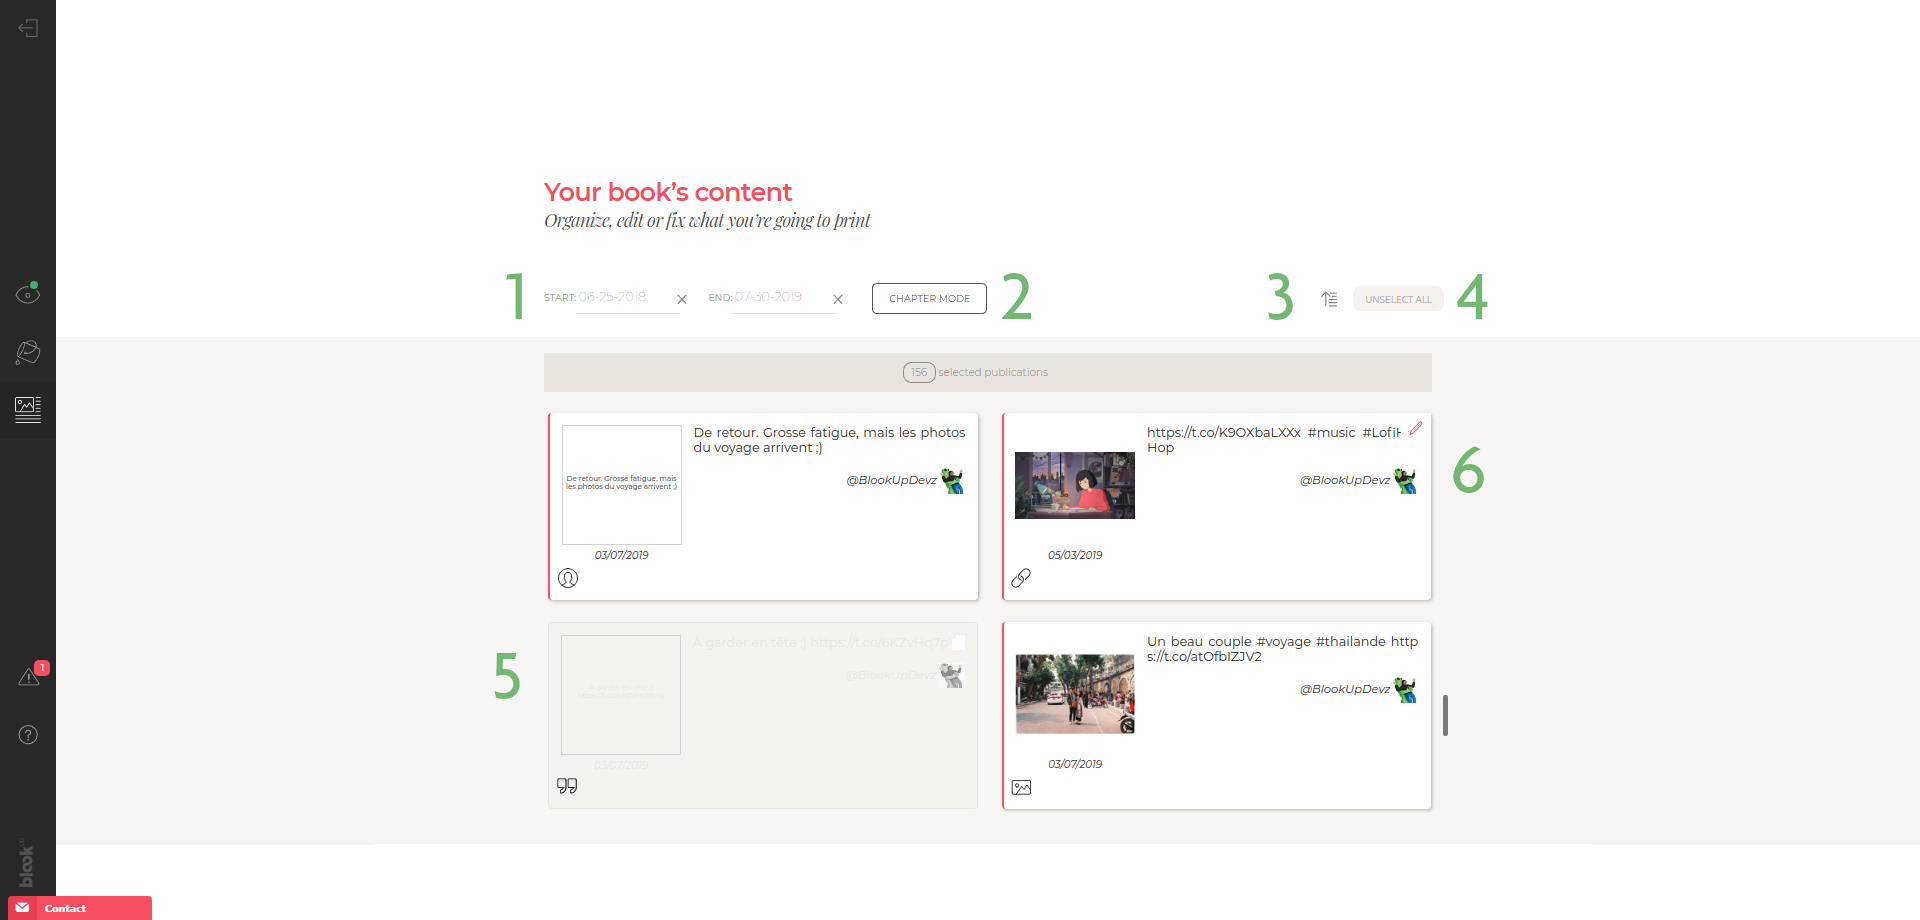
Use the date selection tool to start and finish your book on dates that suit you and/or allow you to fit within 400 pages! ;)
-
To sort your articles by category: click on "Chapter Mode". This option allows you to easily delete or organize multiple items within a category, including, excluding or reordering an entire category;
-
Reverse the order of all your items at once (default order: chronological);
-
De-select or select all your posts at once;
-
To include or exclude individually articles that you wish to see in your blook or not via the
 button, appearing at the overview of the article;
-
Reorder articles by keeping your click on the line of the article and moving it where you want it in your list;
-
Change the content of each article individually with the
 button. From there, here are the new options available to you to personalize your book:
- You will be able to correct, add or remove text.
- You can delete a photo either by placing your mouse cursor on the right of the image and by pressing the "Back" key ( ) on your keyboard, or by clicking on the image and pressing the "Delete" key (
 ) on your keyboard.
- You can also move a photo by holding your click on the image and moving it where you want in your article.
- Be aware that it's not currently possible to individually change the size of your photos, align them, or add new photos.
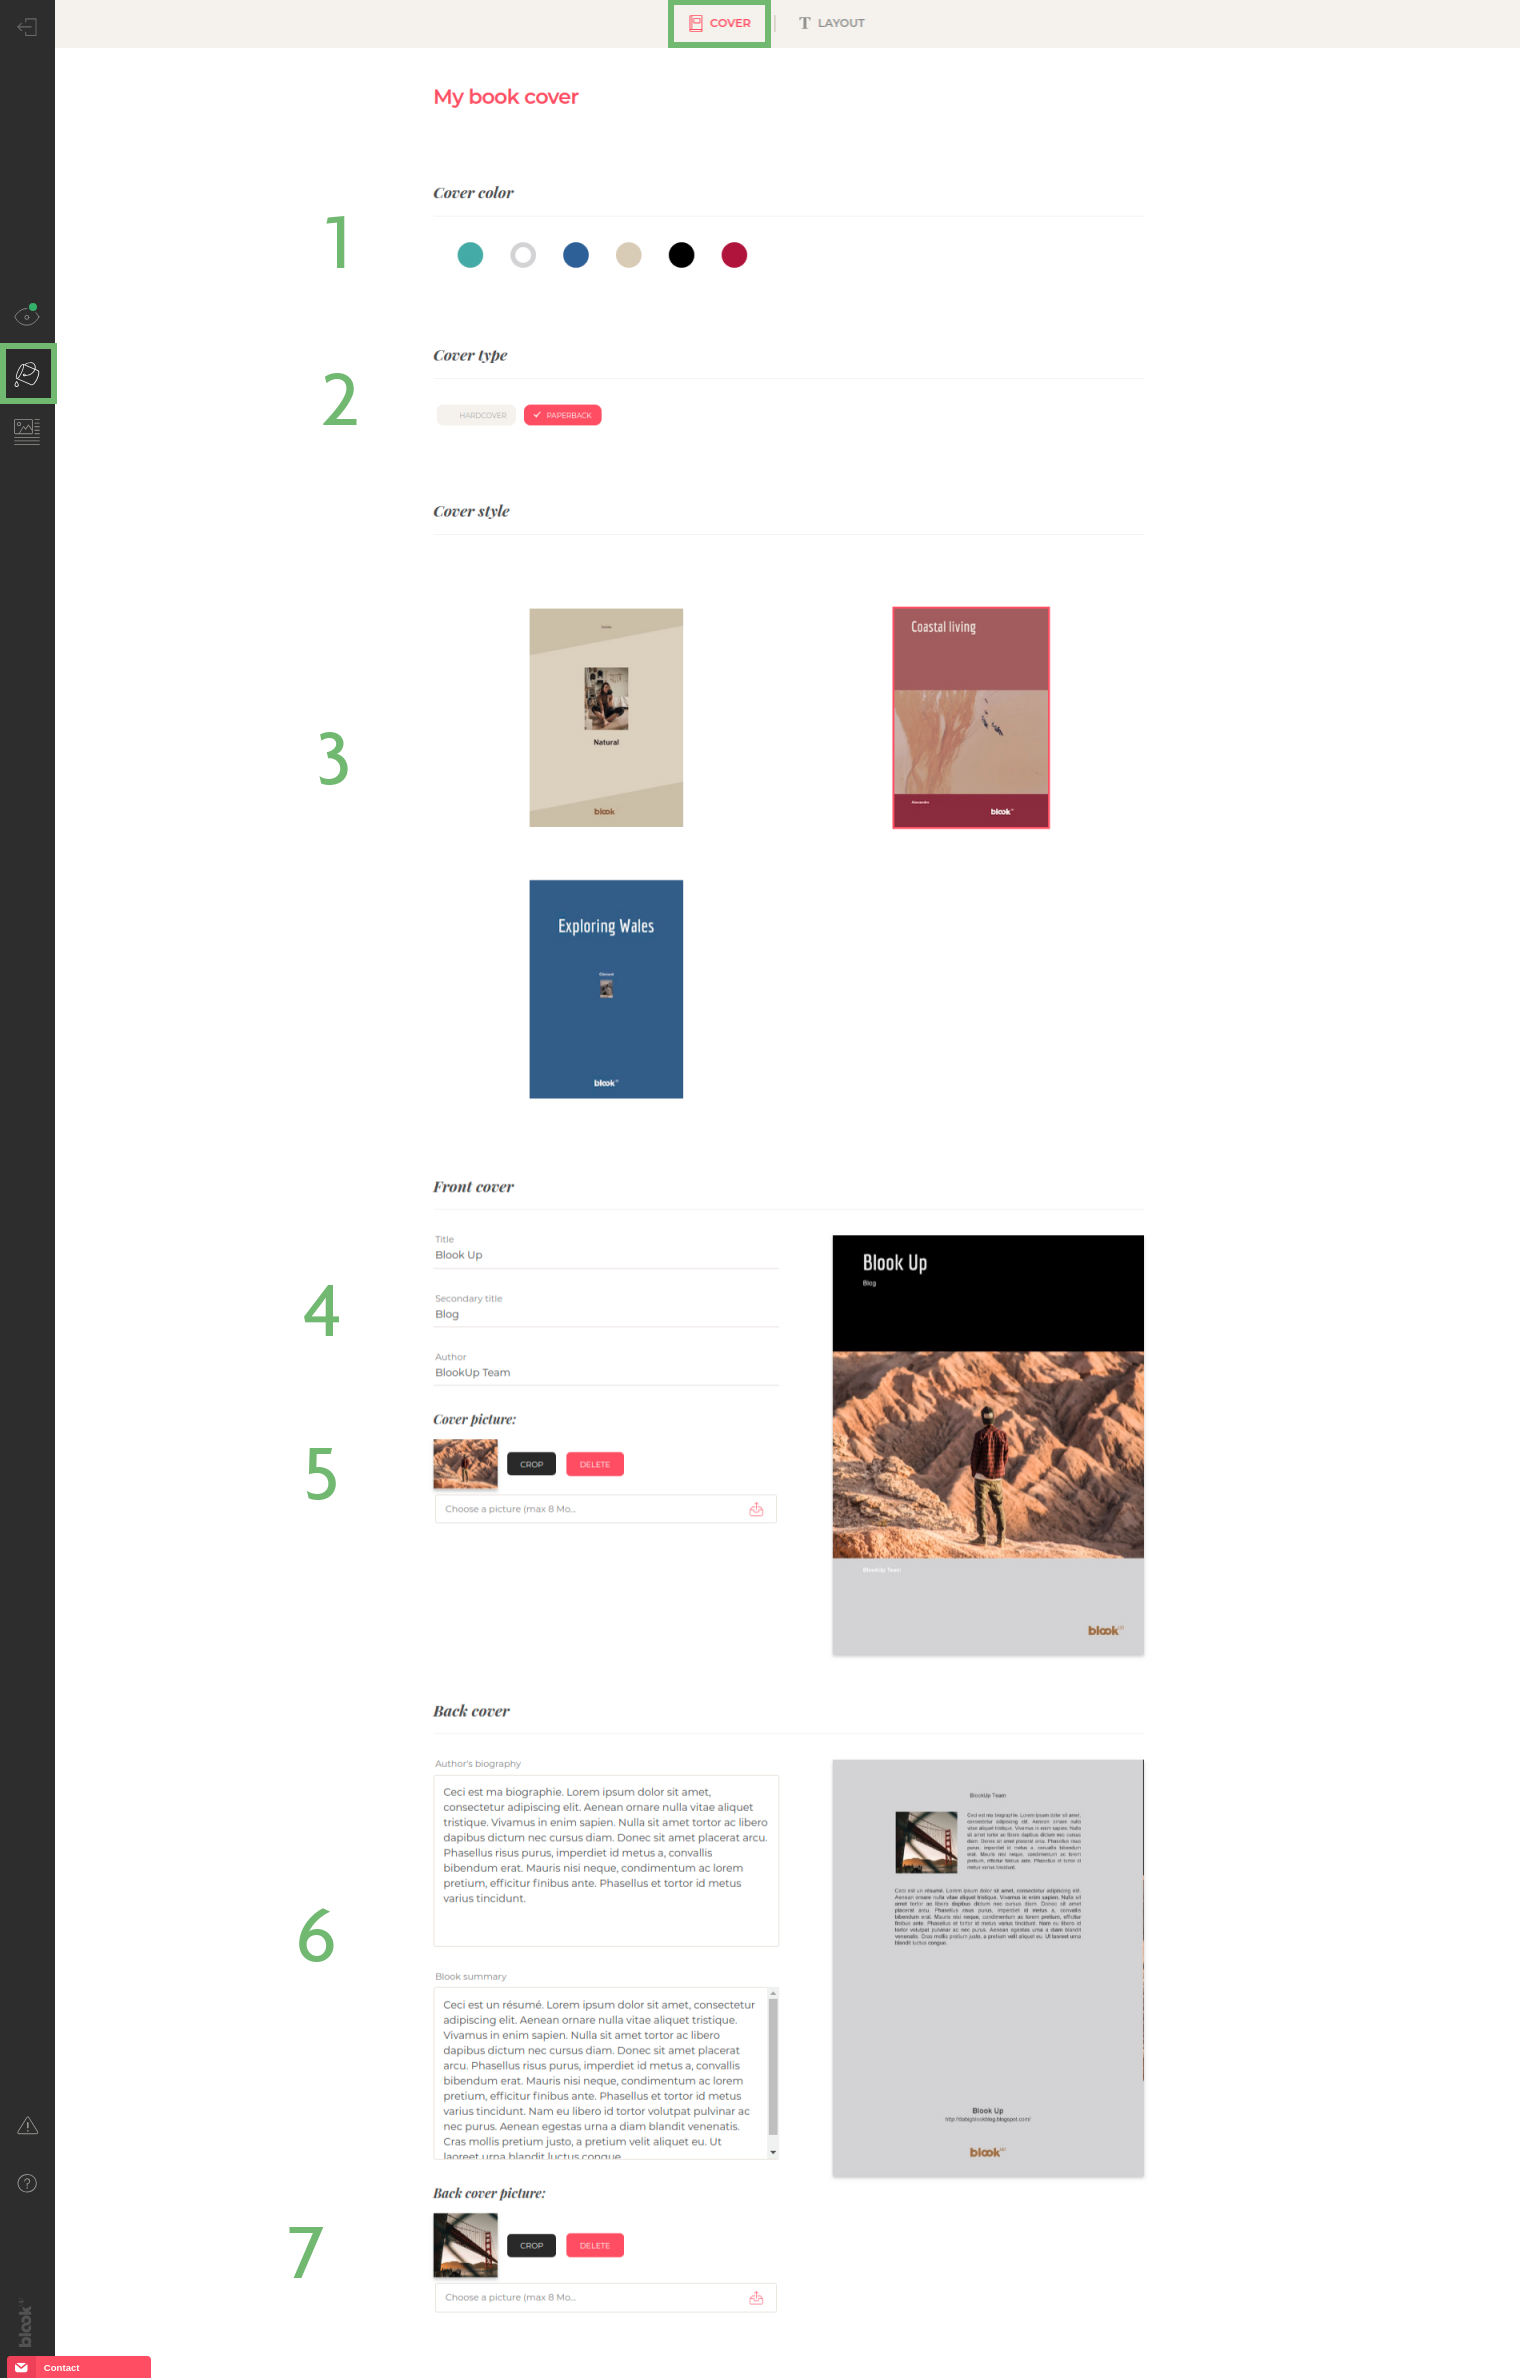
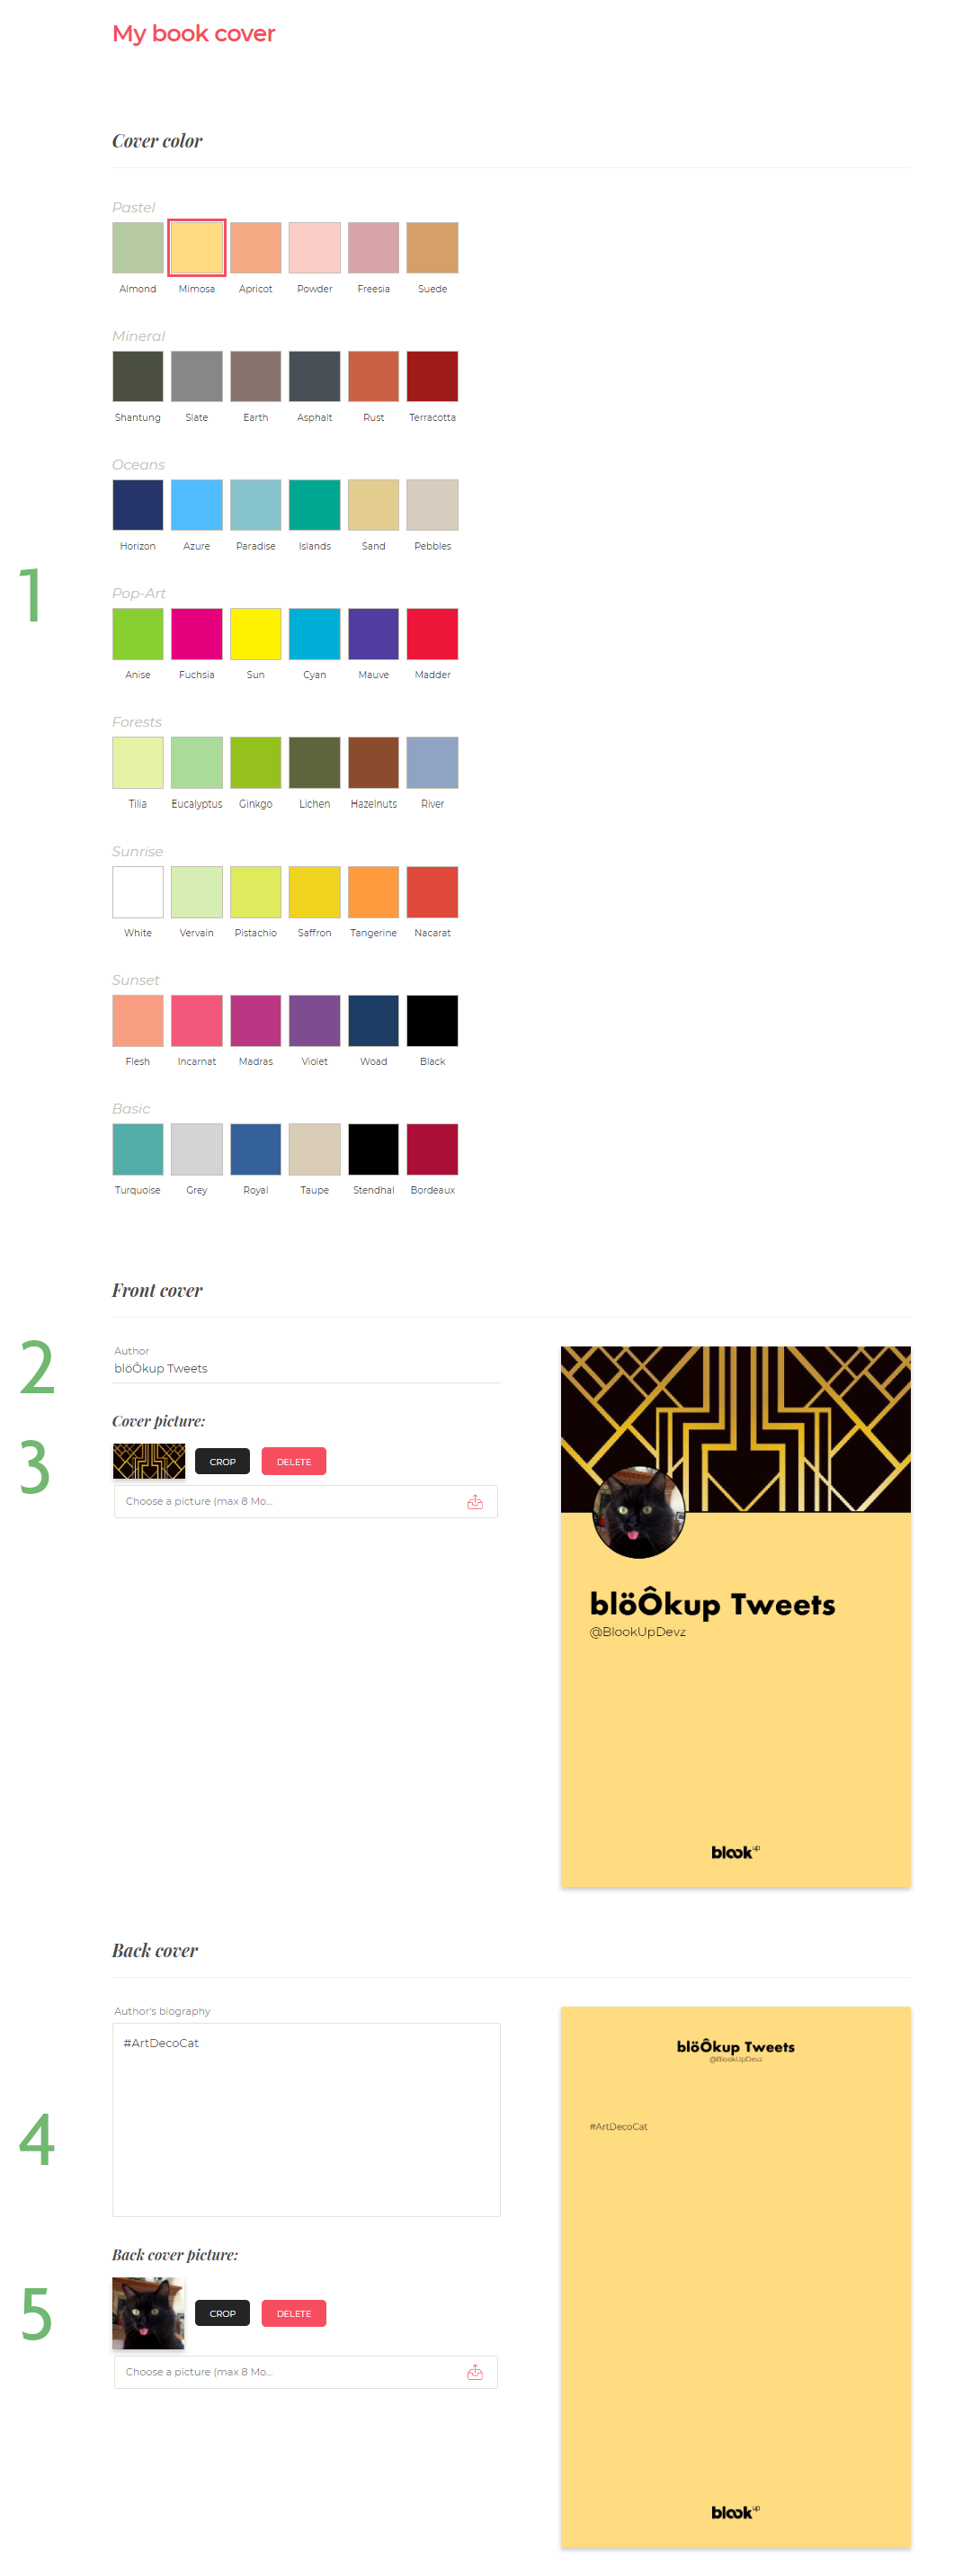
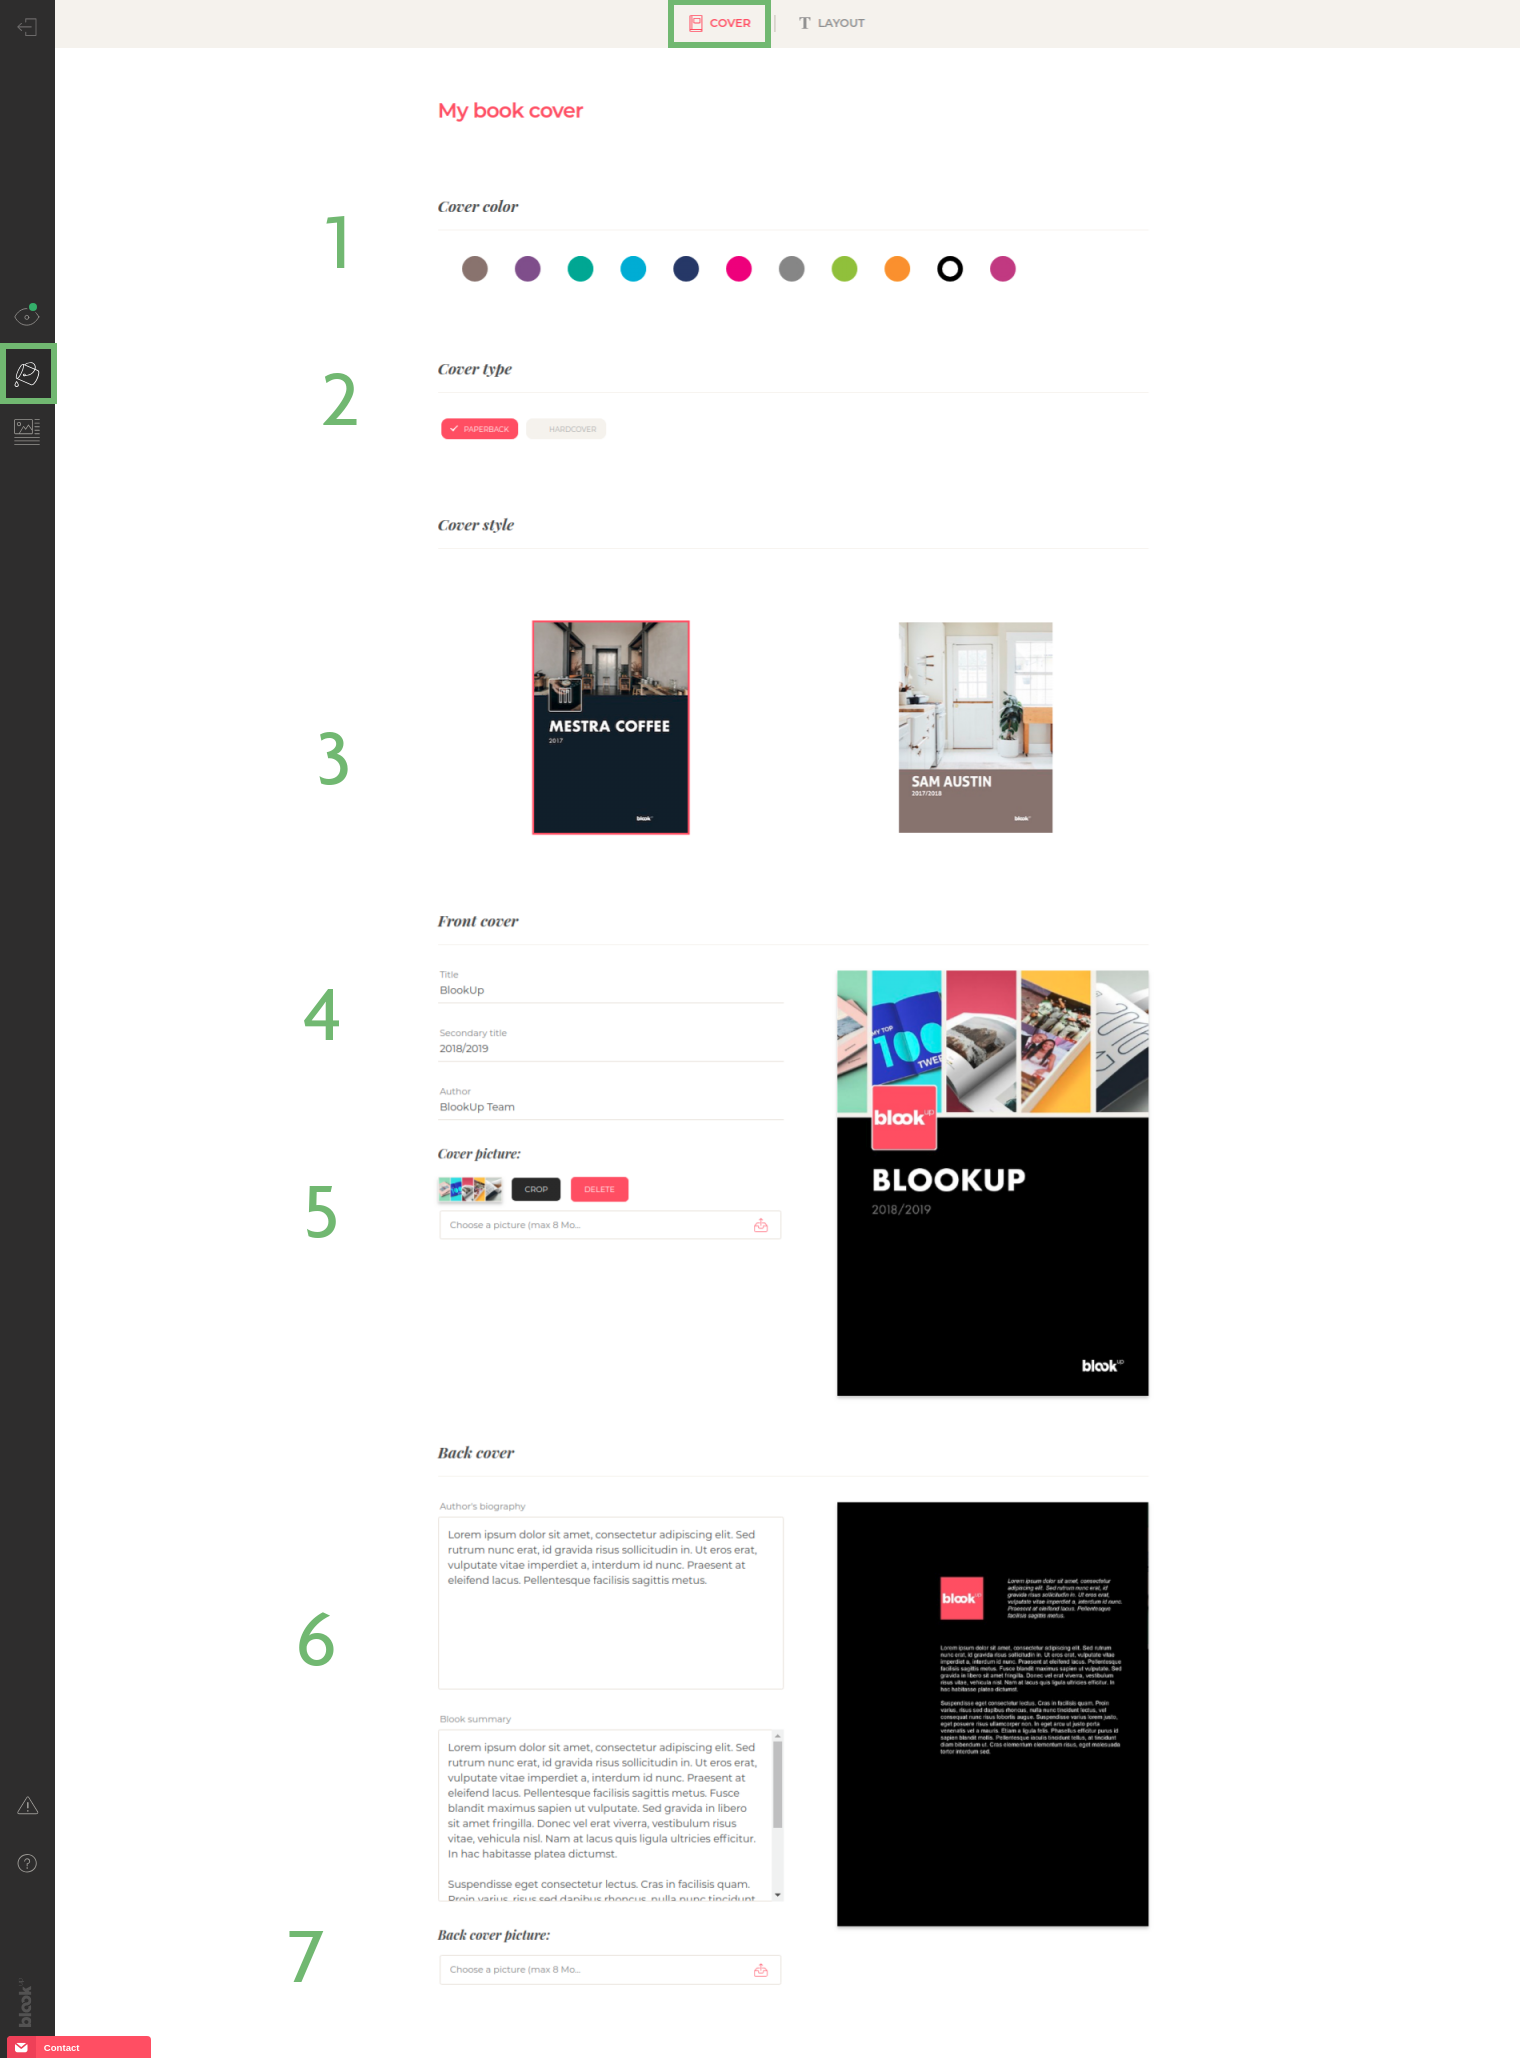
Bring your personal touch to you blook by cutomizing its cover!
-
Choose a color that will represent the spirit of your book;
-
Choose between a soft or hard cover cover;
-
Choose your cover model in order to give some personality to your blook!
-
Fill in the title, subtitle and author's name. These fields are filled by default but fill free to modify them!
-
Select an illustration to include in an existing template. Be careful to choose a high-quality image (at least 885x1240 pixels for the Blog Books and at least 1192x1554 pixels for the Blog Albums);
-
Write your biography and the summary of your book: Pay attention to the text cut and make sure that everything appears on your preview!
-
Select an image from your computer that will be used as a author's portrait for your back cover.
Our editing tool is trying to be perfect, but in the meantime, it will delete the web formatting tags as much as possible and some layouting options cannot be forced, such as:
-
Align text left or right, center it;
-
Applying line breaks and page breaks using Enter, Space, tags < br / > or HTML code " ; n b s p ;"
-
Insert font colors or background colors
-
Change the font (other than the choices presented in the blog books' layout).
Sometimes, some platforms aren't able to give us all the contents we ask for all at once. In order to solve this issue, please carefully follow those steps:
-
Make sure your blog is publicly visible, at least until we're done importing all your contents;
-
In your account, click on the "more details" button below the blook you're trying to layout. Click on "
Edit" to enter the modification of the book, then go to the "edit my blook's content" part ( );
); -
Click on the
icon next to an article where the images are missing in order to enter the editor; -
If you already modified the article, save your changes somewhere on your machine.;
-
Click on "Reset Article" button: The article will automatically reload and reimport the contents directly from the blog, which can make the missing images reappear!
-
Repeat the operation on other articles (if several others have the same problem) if this manipulation was successful for the first one!
Don't hesitate to contact our customer service if you have already checked those steps or if you find any anomaly in your preview so that we can help you before the finalization of your blook ;)
Customizing my book - Instagram
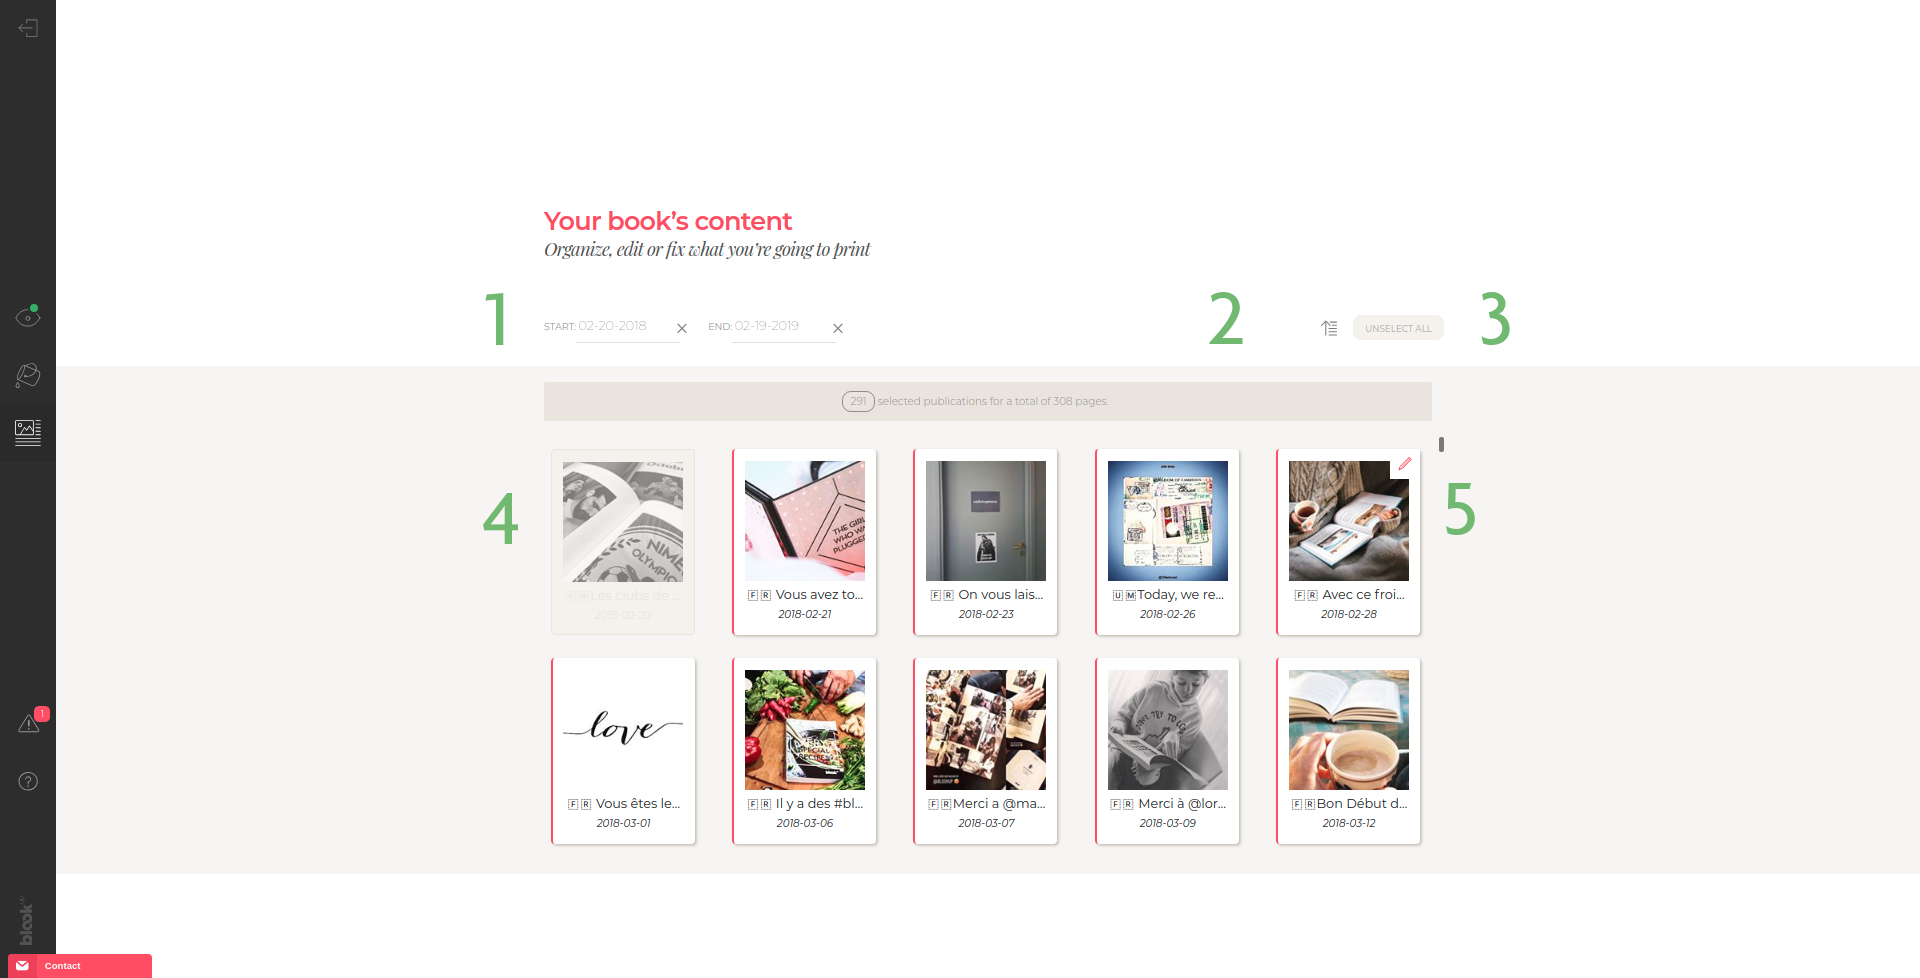
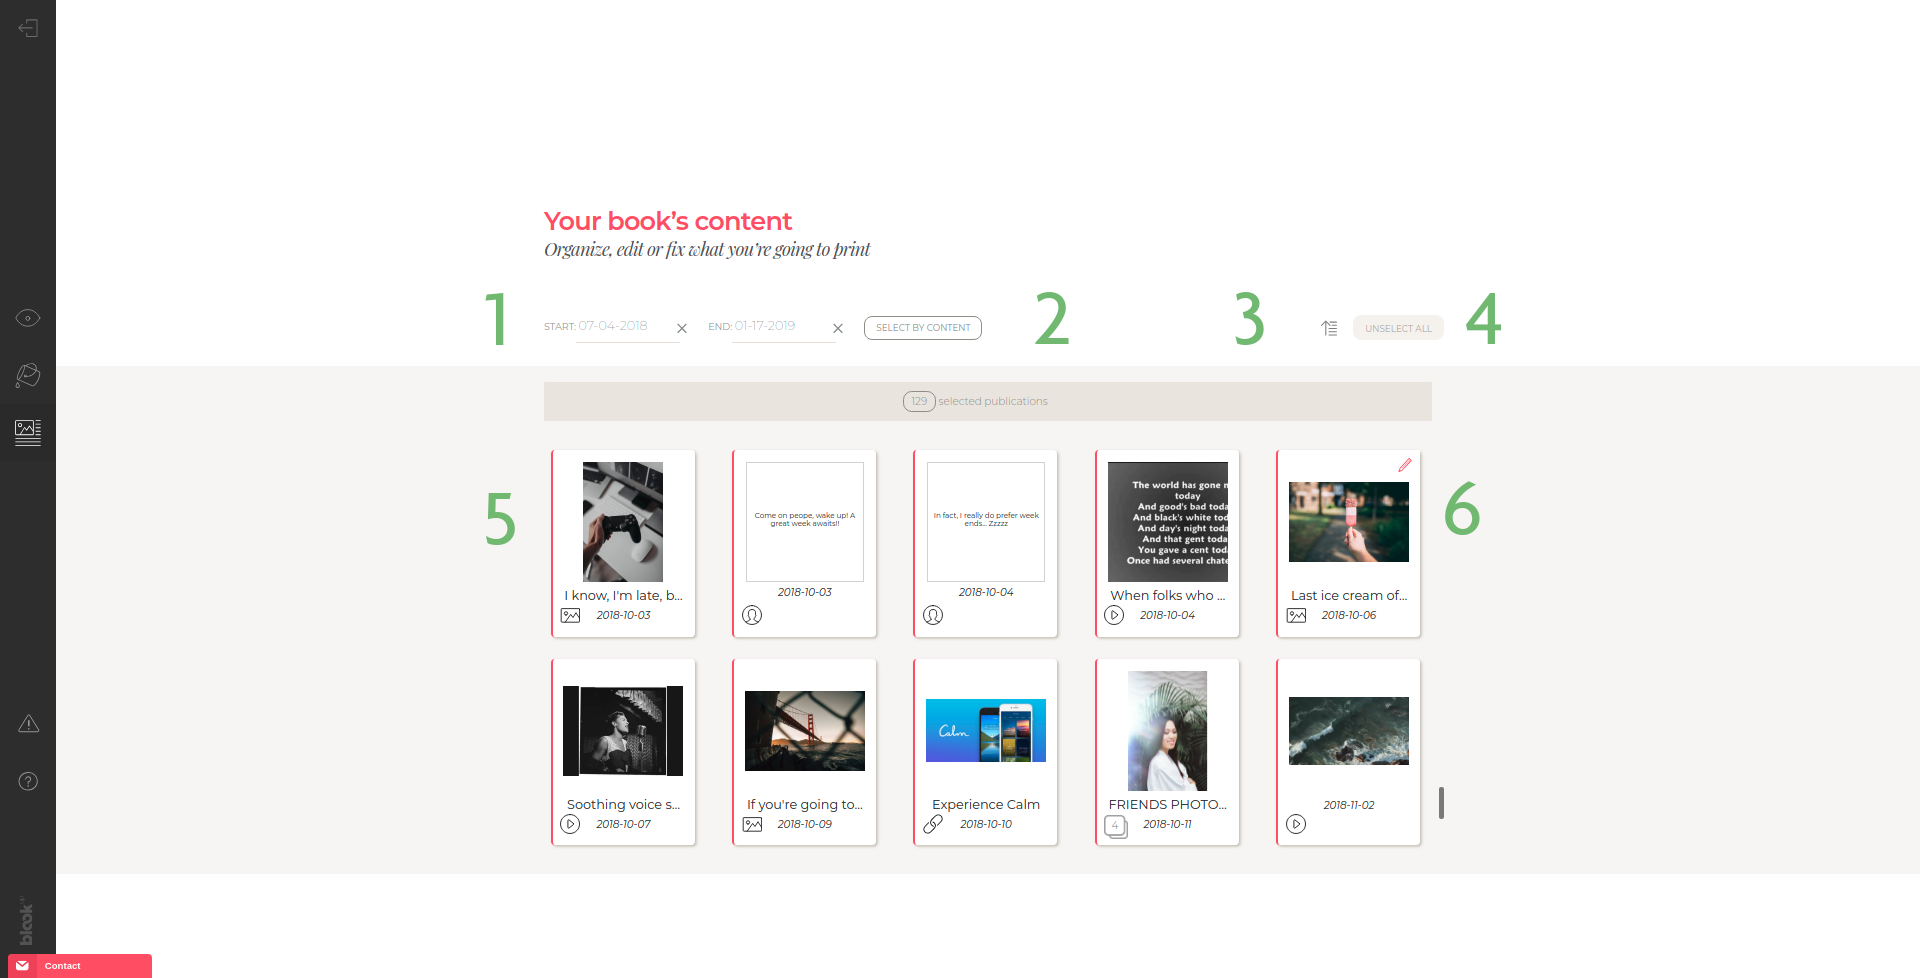
The "Edit your content" window for Instagram books will allow you to:
-
Use the date selection tool to start and finish your book on dates that suit you and/or allow you to fit within 300 pages! ;)
-
Reverse the order of all your items at once (default order: chronological);
-
De-select or select all your photos at once;
-
Individually include, exclude (by clicking on the thumbnail) or reorder the photos (by holding click on the thumbnail of your choice and moving it in the list);
-
The possibility to modify each picture's caption. Be aware that only 3 lines will be displayed under your photos in the blook, so choose your words wisely!
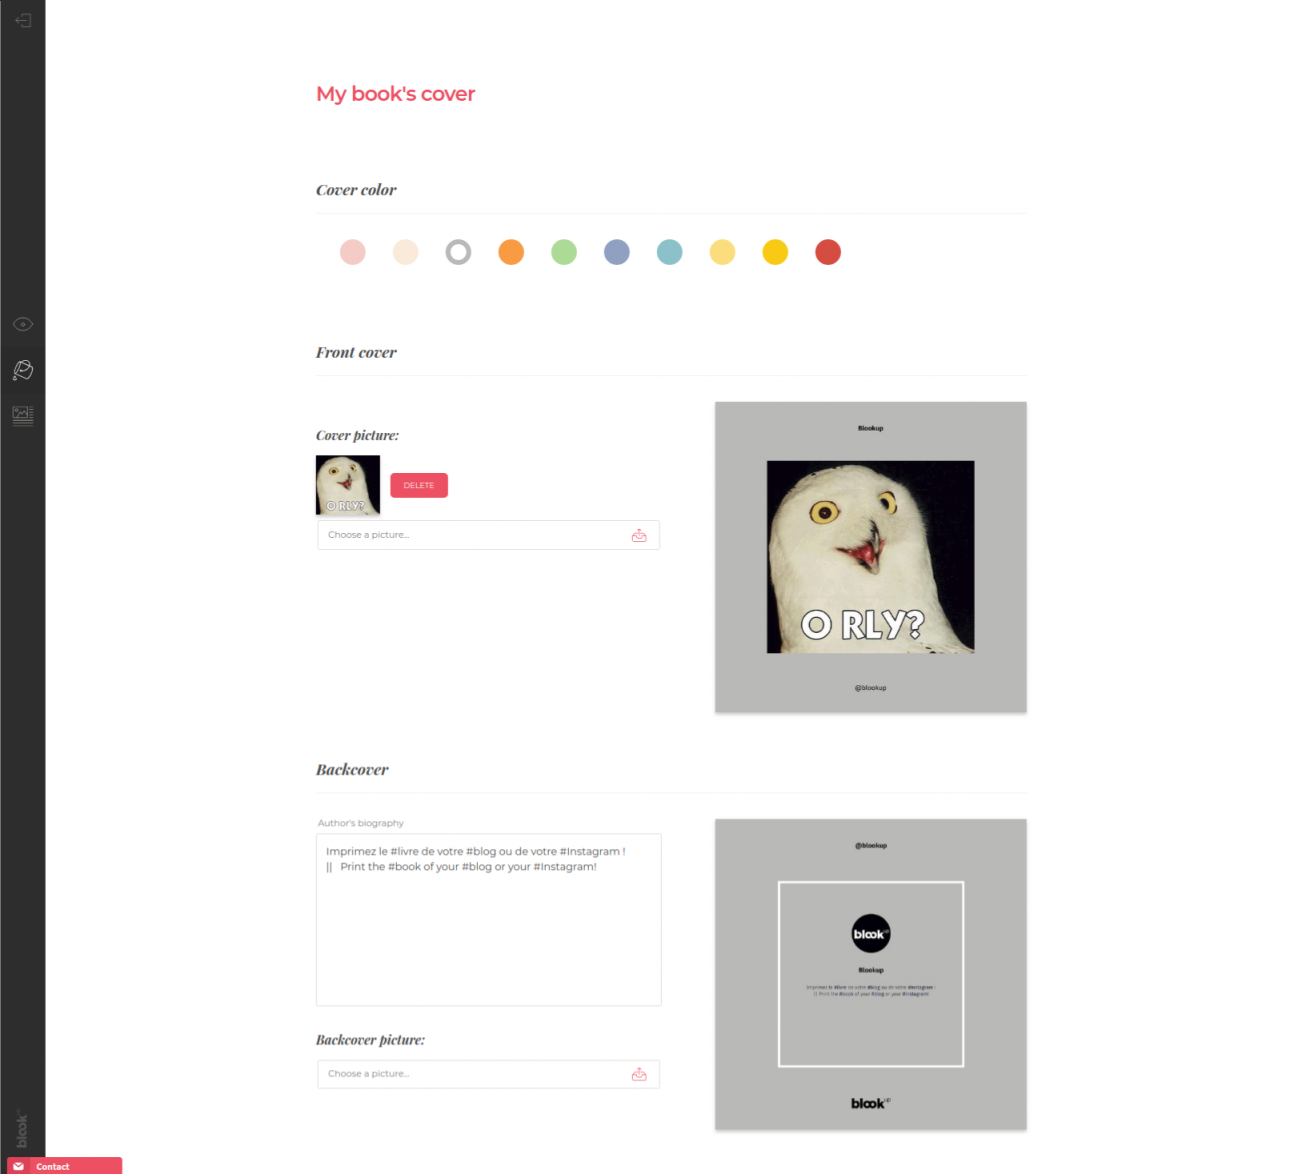
Bring your personal touch to you blook by cutomizing its cover!
-
Choose the color that will reflect the personnality of your book;
-
Select an image from your computer to integrate to the already existing design. WARNING : Images imported by default from your Instagram may not be optimized for printing, make sure they are of good quality on your Instagram account or to replace it by a good quality image with a mimimum resolution of 2000*2000 pixels;
-
Write your biography: Pay attention to how the text appears on your preview!
-
Select an image from your computer that will be used as the author's portrait for the back cover. Make sure it also is of high-quality.
Customizing my book - Twitter
The "Layout" of our editing tool will allow you to easily:
-
Choose a solo (one tweet per page) or duo layout for the inner pages of your book.
The "Edit your content" window for Twitter books will allow you to:
-
Use the date selection tool to start and finish your book on dates that suit you and/or allow you to fit within 300 pages! ;)
-
To sort your articles by category: click on "Chapter Mode". This option allows you to easily delete or organize multiple items within a category, including, excluding or reordering an entire category;
-
Reverse the order of all your items at once (default order: chronological);
-
De-select or select all your posts at once;
-
Individually include or exclude publications (by clicking on the thumbnail) ;
-
Edit the content of each publication individually with the
icon. You can, among other things, correct, add or remove text in your main publication, your links, events, places, their description, and select or de-select your photos, links overview, videos... Beware! It is currently impossible to add new photos.
Bring your personal touch to you blook by cutomizing its cover!
-
Choose the color that will reflect the personnality of your book;
-
Fill in the author's name that you want to see in the book. This field is filled in by default;
-
Select an image from your computer to integrate to an already existing design.WARNING : Banners imported by default from your Twitter profile might not be optimized for printing, make sure to replace it by a good quality image with a mimimum resolution of 1000*1000 pixels;
-
Write your biography and the summary of your book: Pay attention to the characters limit and check that everything appears on your preview!
-
Select an image (avatar) from your computer that will be used as the author's portrait for the cover and back cover. Make sure it also is of high-quality.
Customizing my book - Facebook
A Facebook blook can either be a Profile Book or a Fan Page Book (administrated or liked). The two books are strictly identical, but each one will import different contents. Choose wisely! ;)
The "Layout" of our editing tool will allow you to easily:
-
Choose a 1, 2 or 3-columns layout for the inner pages of your book.
The "Edit your content" window for Facebook books will allow you to:
-
Use the date selection tool to start and finish your book on dates that suit you and/or allow you to fit within 300 pages! ;)
-
To make the selection of your contents according to their type: Photos, texts, videos, places, galleries, links, events, links carousels;
-
Reverse the order of all your items at once (default order: chronological);
-
De-select or select all your posts at once;
-
Individually include or exclude publications (by clicking on the thumbnail) ;
-
Edit the content of each publication individually with the
icon. You can, among other things, correct, add or remove text in your main publication, your links, events, places, their description, and select or de-select your photos, links overview, videos... Beware! It is currently impossible to add new photos.
Bring your personal touch to you blook by cutomizing its cover!
-
Choose the color that will reflect the personnality of your book;
-
Choose between a hard or a soft cover!
-
Choose the type of cover that will give personnality to your blook;
-
Fill in the title, subtitle and author's name that you want to see on the book. Those fields are filled in by default;
-
Select an image from your computer to integrate to an already existing design.WARNING : Banners imported by default from your profile or your Facebook page might not be optimized for printing, make sure to replace it by a good quality image with a mimimum resolution of 2000*2000 pixels;
-
Write your biography and the summary of your book : Pay attention to the characters limit and check that everything appears on your preview!
-
Select an image (avatar) from your computer that will be used as the author's portrait for the cover and back cover. Make sure it also is of high-quality.
Customizing my book - Tumblr
The "Edit your content" window for Tumblr books will allow you to:

-
Use the date selection tool to start and finish your book on dates that suit you and/or allow you to fit within 300 pages! ;)
-
To make the selection of your contents according to their type: Texts, links, chats, videos, quotes, answers, photos;
-
Reverse the order of all your items at once (default order: chronological);
-
De-select or select all your posts at once;
-
Individually include or exclude publications (by clicking on the thumbnail) ;
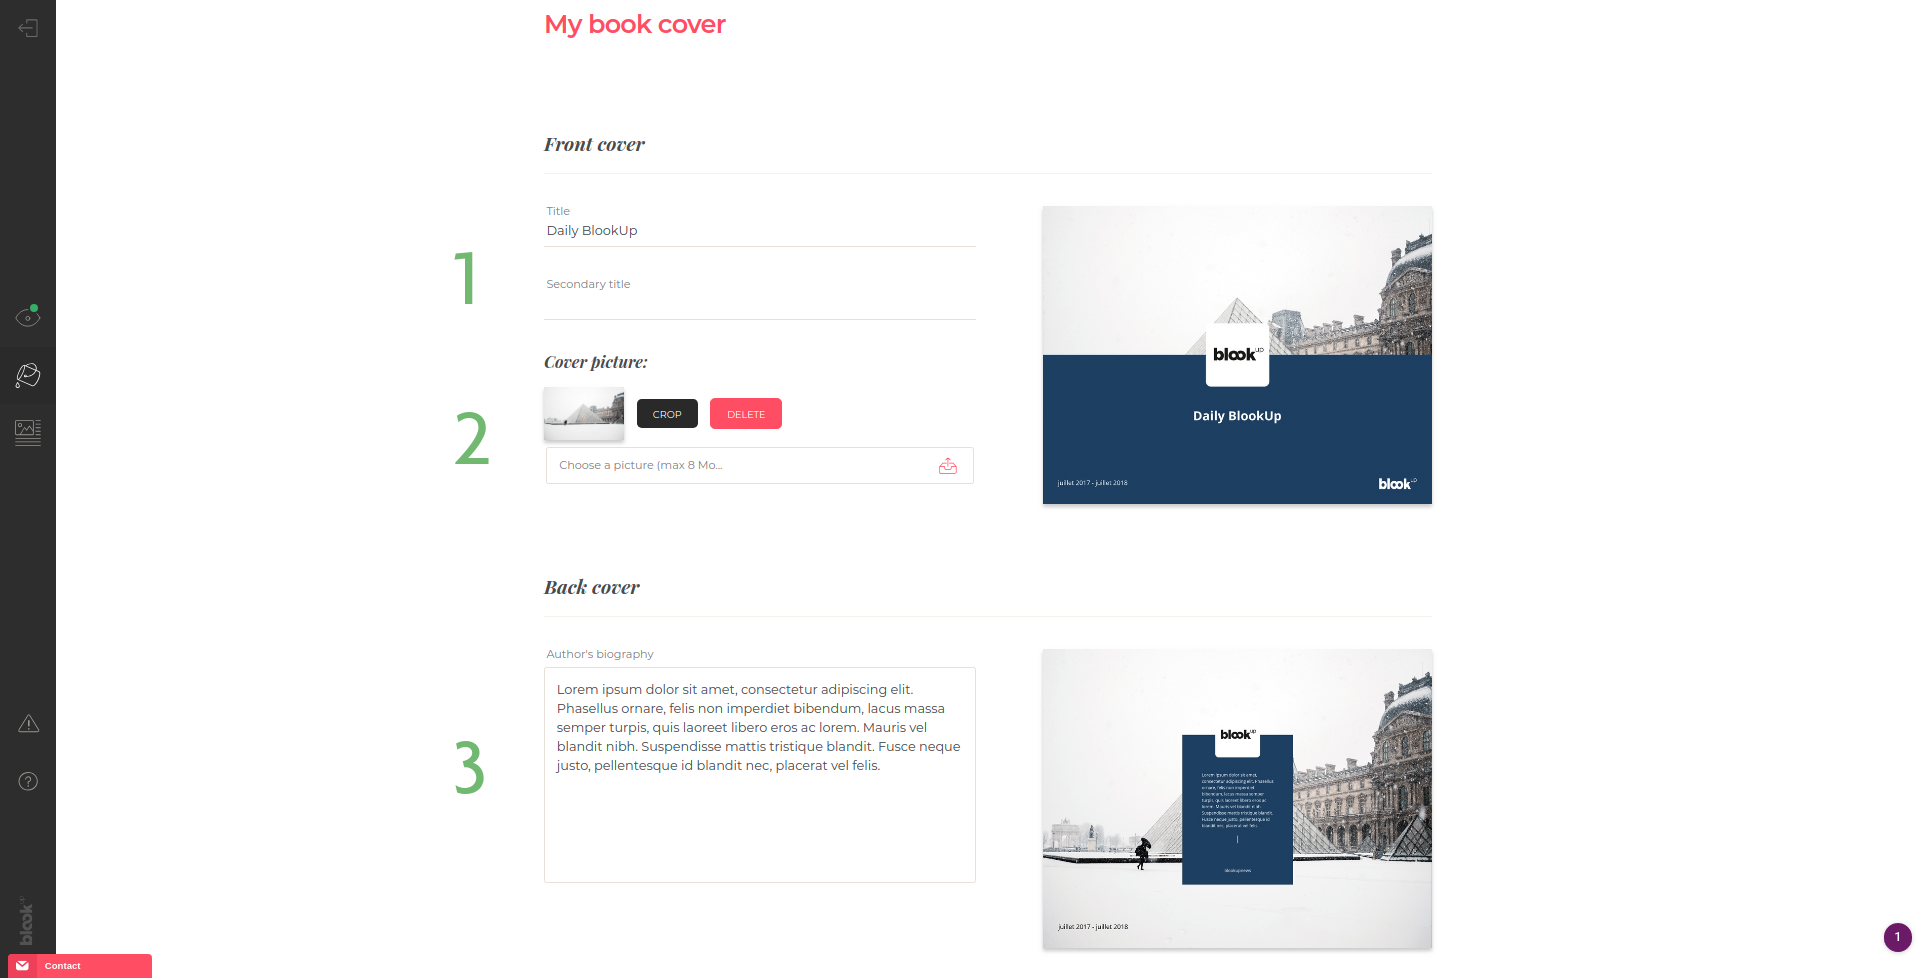
Bring your personal touch to you blook by cutomizing its cover!
-
Fill in the title and subtitle that you want to see on the book. The title field is filled in by default;
-
Select an image from your computer to integrate to an already existing design.WARNING : Make sure to choose a good quality image with a mimimum resolution of 4000*4000 pixels;
-
Write your biography: Pay attention to the characters limit and check that everything appears on your preview!
Customizing my book - Top 100
The "Edit your content" part is only available for Twitter Top 100 books and will allow you to:

-
De-select or select all your posts at once;
-
Individually include or exclude publications (by clicking on the thumbnail) ;
-
Edit the content of each publication individually with the
icon. You can, among other things, correct, add or remove text in your main publication, your links, events, places, their description, and select or de-select your photos, links overview, videos... Beware! It is currently impossible to add new photos.
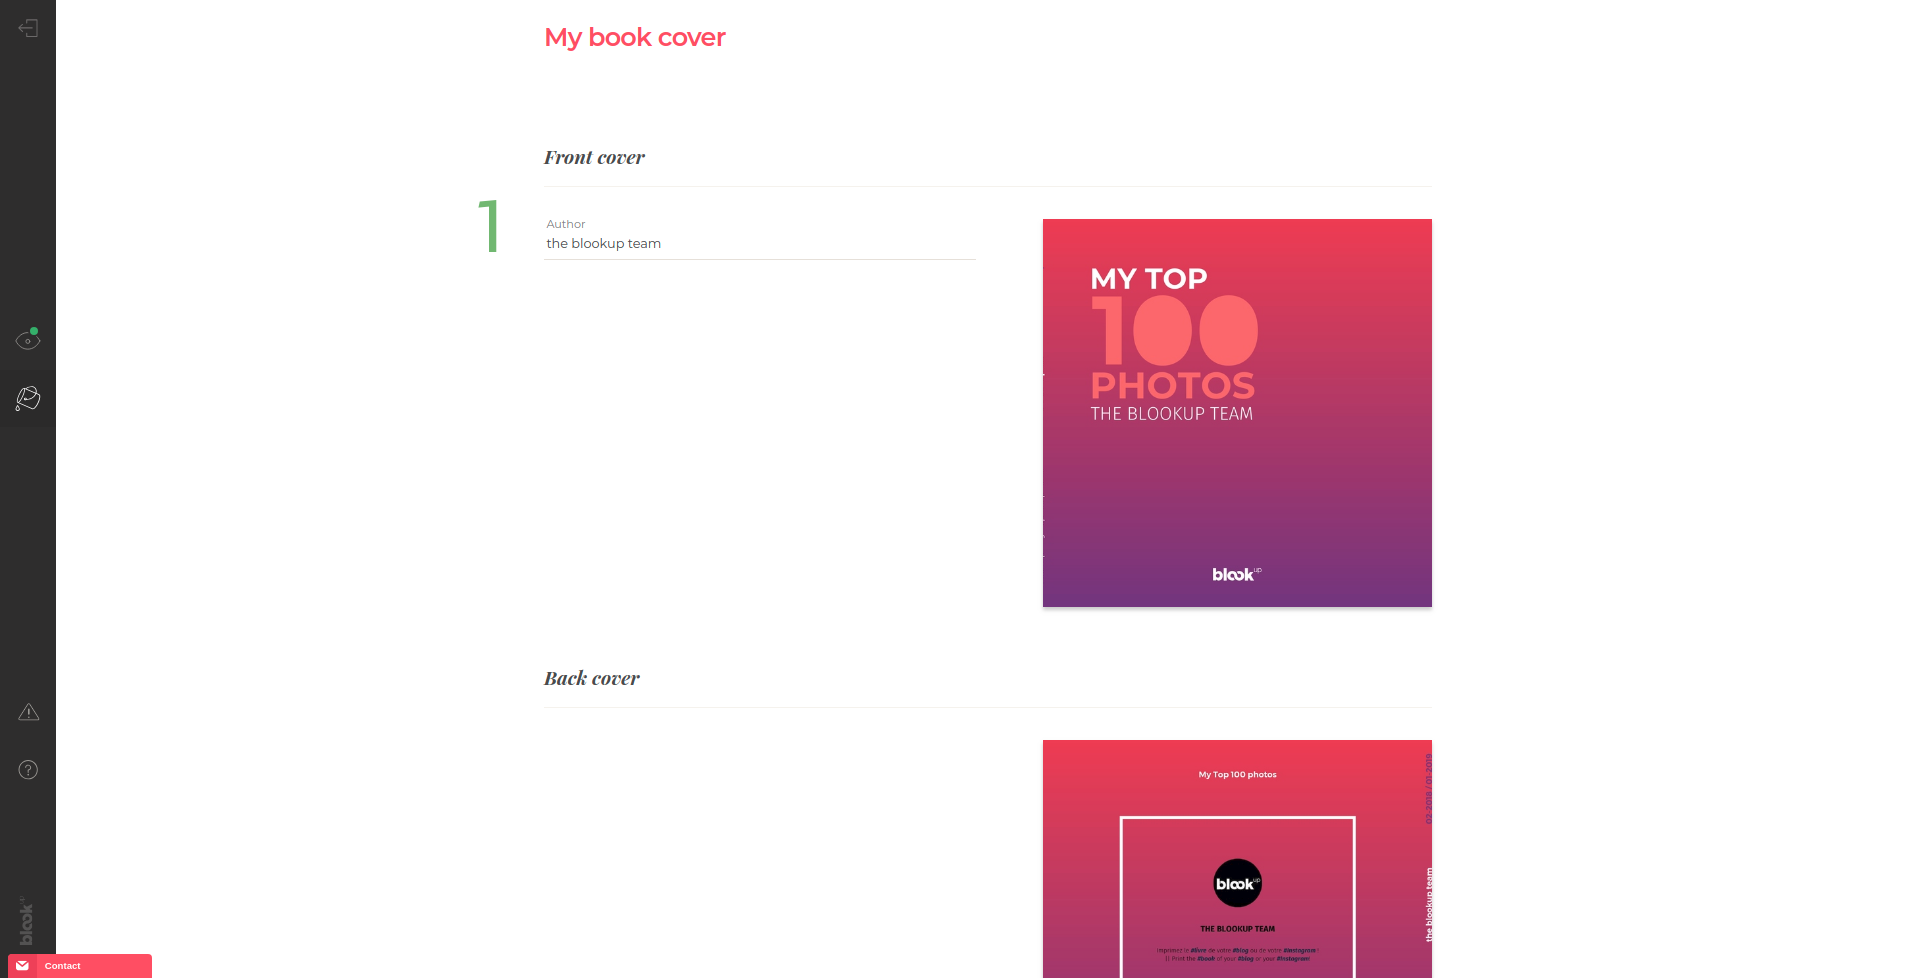
"Top 100" books' covers can also be customized... ish!
-
Change the title of your blook here. This field is filled by default.
Customizing my book - PDF
The "Organize your content" part for the PDF book does not exist: You must indeed format your content yourself in the smallest detail;) If you want to modify your content, you will need to modify your original file, convert it to PDF and upload back to our site !
Bring your personal touch to you blook by cutomizing its cover!

-
Choose a color that will represent the spirit of your book;
-
Choose your cover model in order to give some personality to your blook!
-
Fill in the title, subtitle and author's name. These fields are filled by default but fill free to modify them!
-
Select an illustration to include in an existing template. Be careful to choose a high-quality image (at least 885x1240 pixels for the Blog Books and at least 1192x1554 pixels for the Blog Albums);
-
Write your biography and the summary of your book: Pay attention to the text cut and make sure that everything appears on your preview!
-
Select an image from your computer that will be used as a author's portrait for your back cover.
Managing orders
Our blook creation tool saves and applies your modifications each time you come back on your book's global preview via the icon  or
or  . You can make changes and update the preview any time you want, without time or try limitation, until the result is exactly how you want it to be!
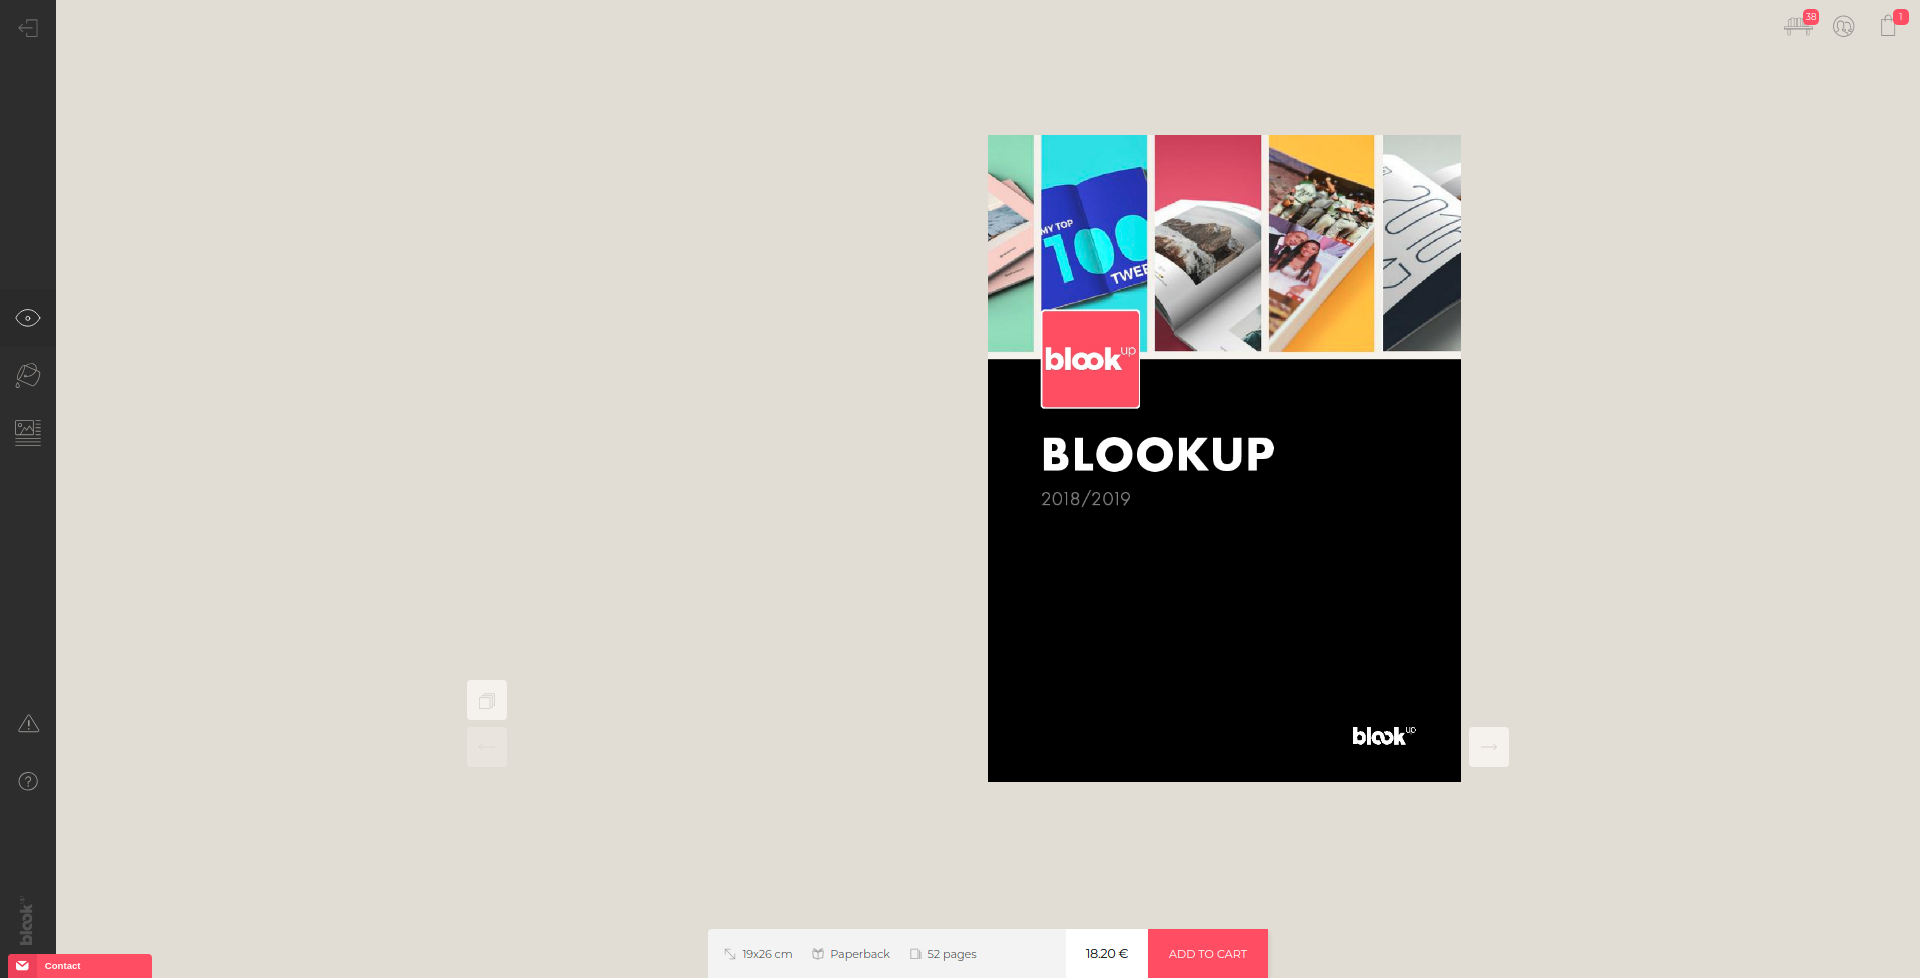
This preview reflects exactly the book that you will get in your letter box and is your ready-for-press proof. Once ordered, a blook cannot be modified anymore so it is absolutely necessary to double check attentively your entire preview ;)
Contact us if you notice any problem on your preview so we can investigate and correct things before the finalization and the order of your blook!
When you create and customize your book, a "Add to cart" button will allow you to quickly and easily order it.
When you import your blook without ordering it, it stays saved in your account.Click on the "order my blook" button located below to buy it!
It is completely possible to order other blooks by repeating the same operation or to order the same blook several times by adjusting the quantity accordingly in your cart!
While your blook is in your cart, you can still modify it by removing it from said cart but once the order is placed, it cannot be modified anymore.
Don't forget that you can see the preview of your blook ( or ) as many time as you want and contact our customer service if you notice any issue before placing your order.
If you want to modify your order (delivery address, blooks quantity...), you must contact our customer service as soon as possible so we can see if making changes is possible, depending on the order's current status. Each demand will be treated depending on its feasibility in accordance to our General Terms and Conditions of Sale.
The BlookSpace - Selling and sharing blooks
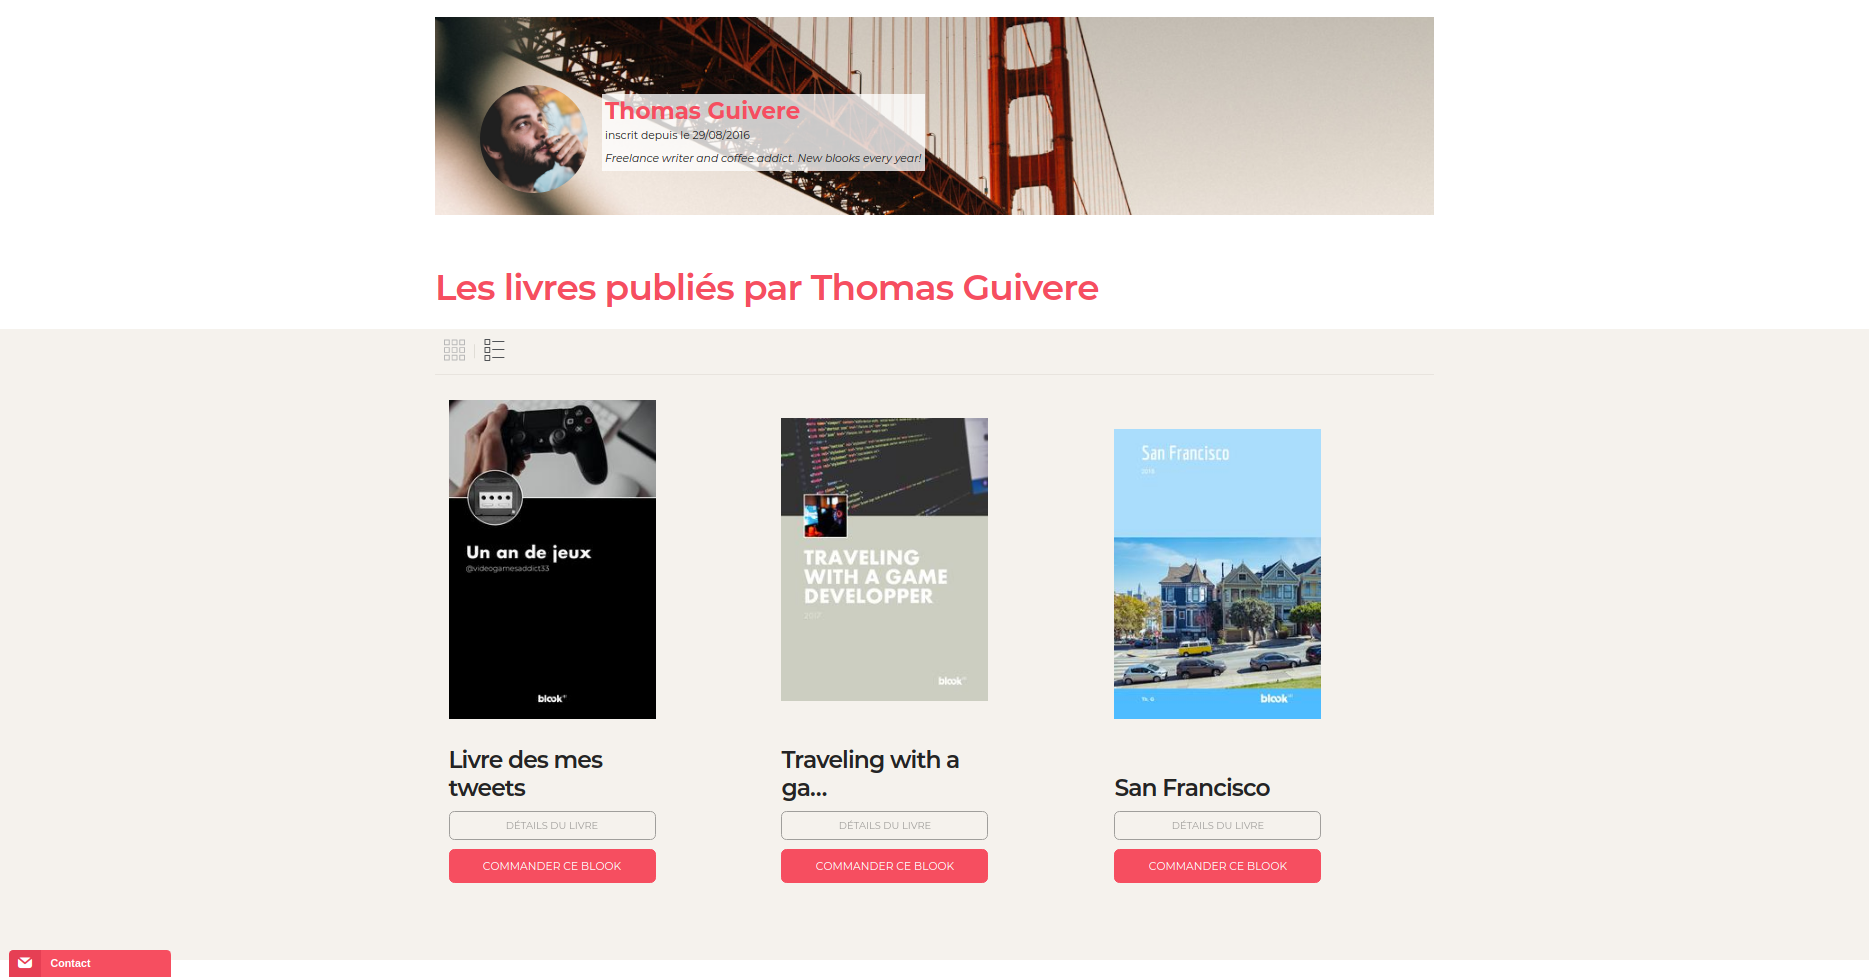
The BlookSpace is a public page, accessible from the creation of your account and gathering the blooks that you have decided to make also public.
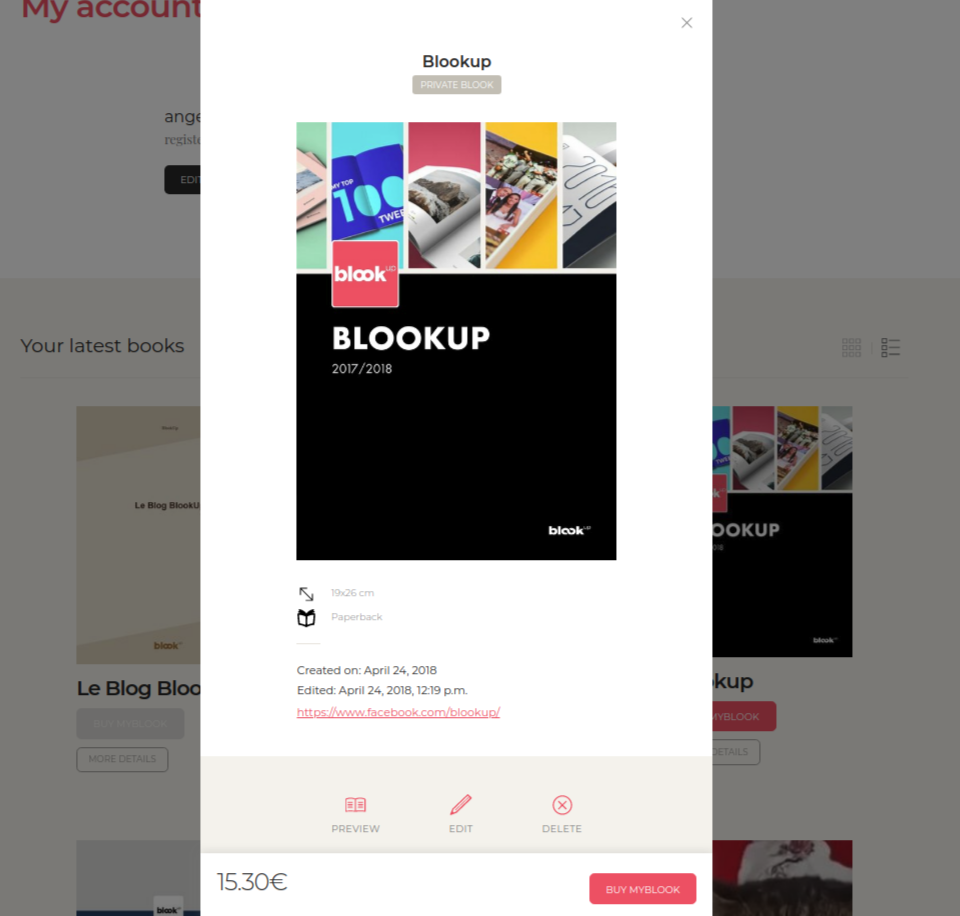
Each published book also has its own detailed page ("see this book" button), where web users can read the description of your work and flip through it.
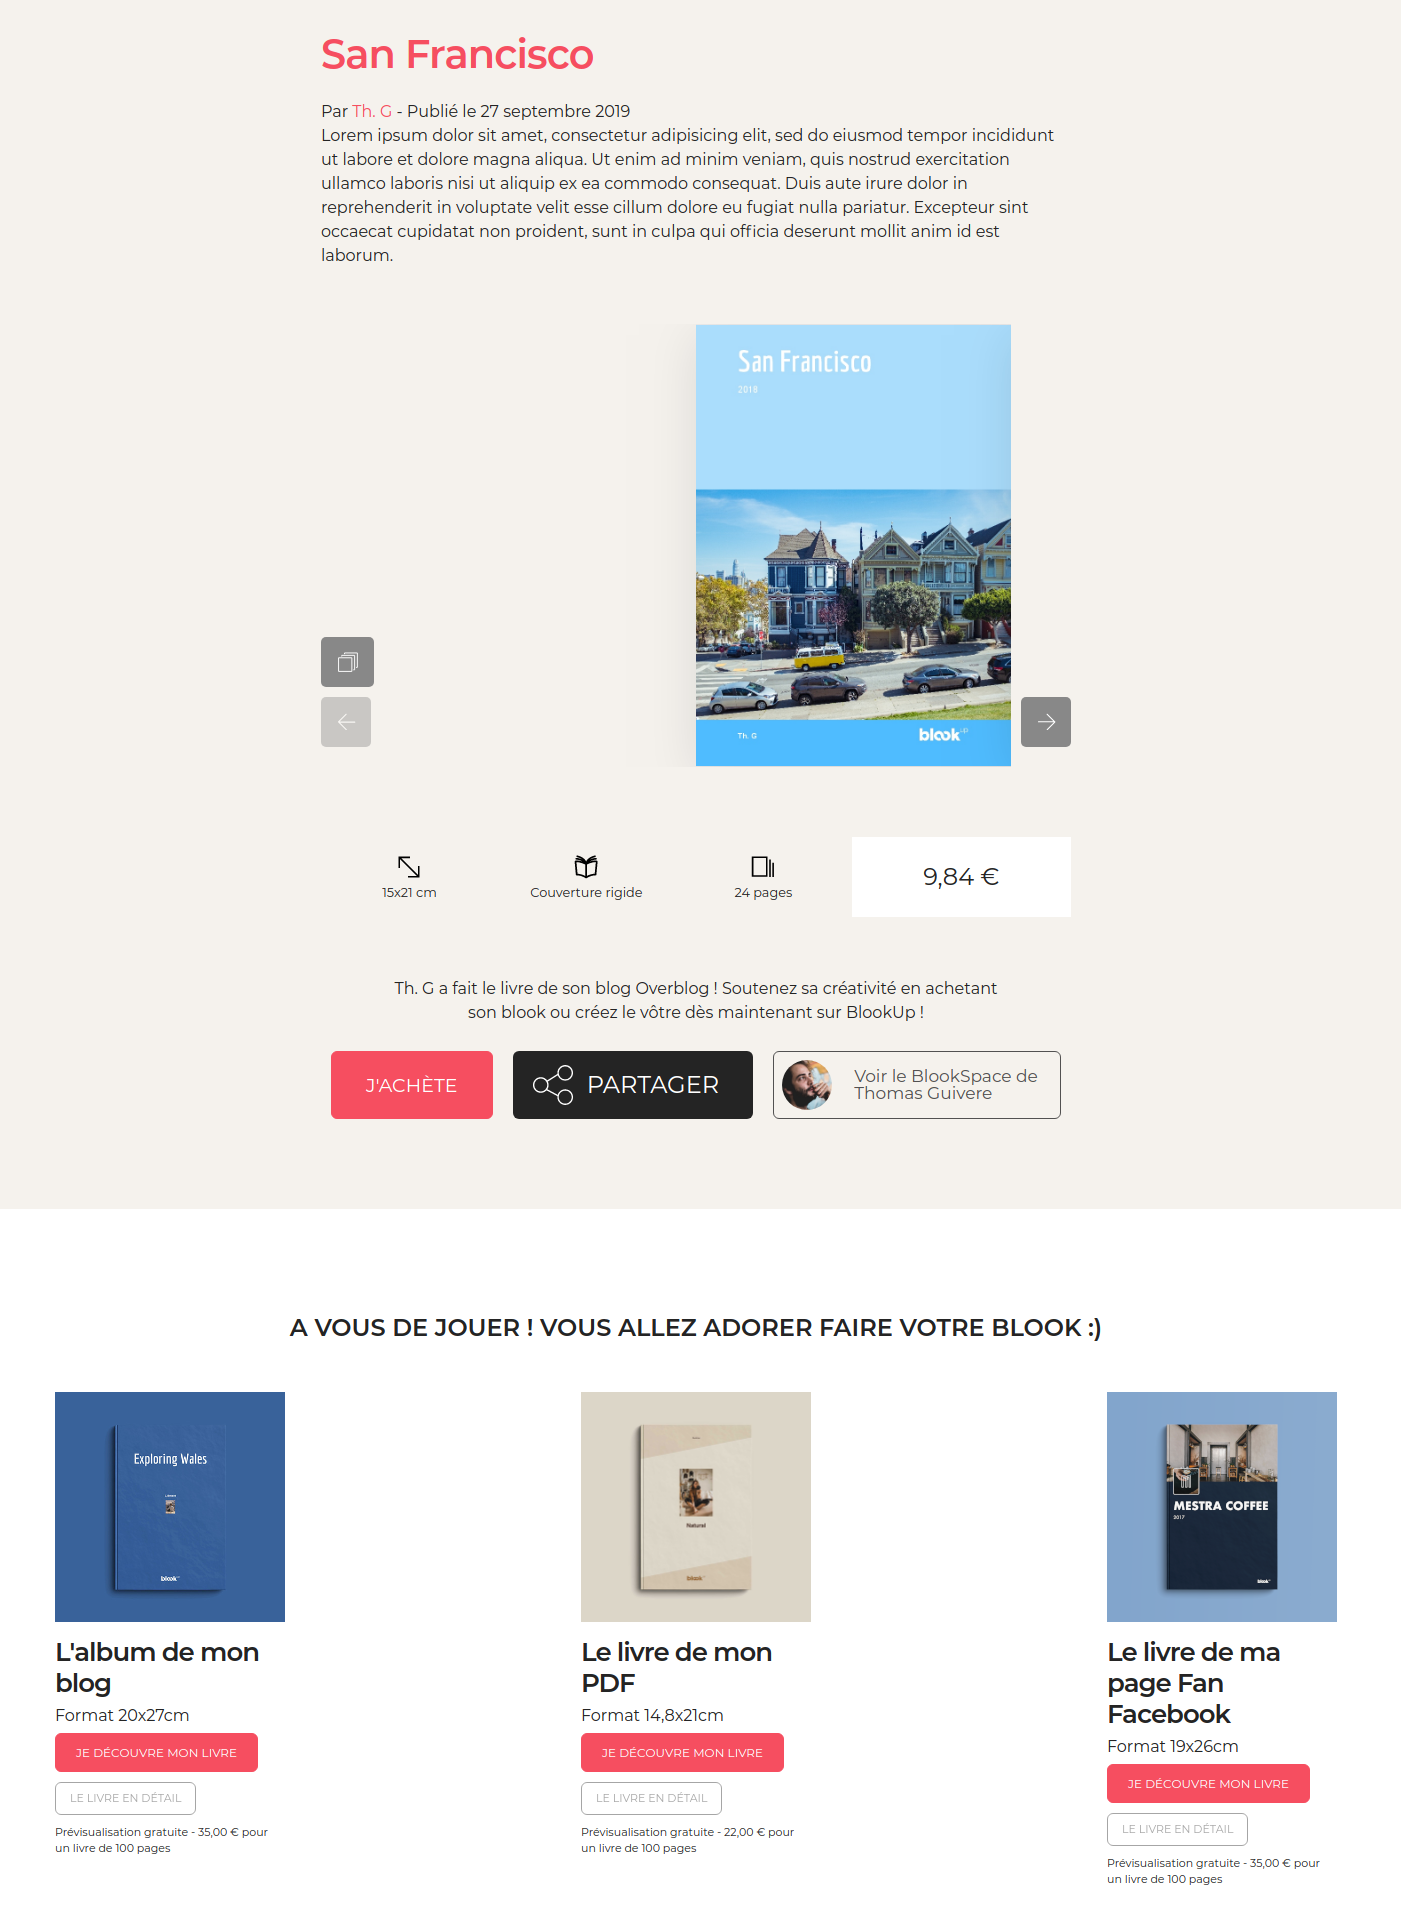
Promote your BlookSpace or each book individually by clicking on one of the buttons corresponding to the sharing platform of your choice :) Your book will naturally be referenced on the search engines and will benefit from the visibility of the BlookUp site when users search for the title of your book on the web.
Unlike traditional publishing, blook authors own their works. Blookup is neither the owner nor the owner of the content and does not post any content on behalf of the authors. Blooks, however, do not have ISBN numbers.
All the blooks you create are by default private: You are the only person to see it and can order it from your personal account. You can decide to make them public and share / sell them in your online bookstore, BlookSpace, by clicking on the "Publish" or "Publish My Blook" button.
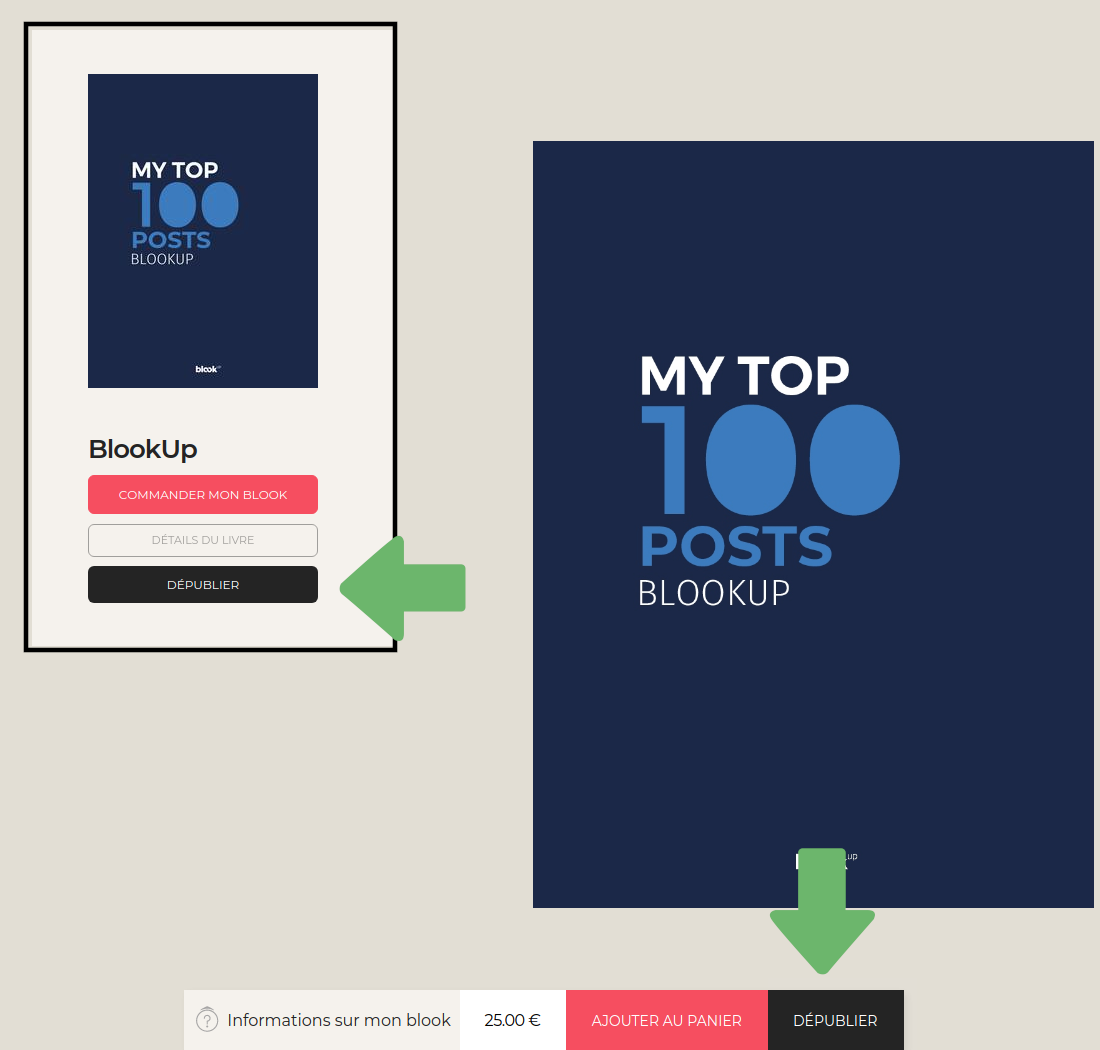
You can make a blook private again anytime by clicking the "Unpublish" or "Unpublish this blook" button.
Your copyright always represents 10% of the price of the blook you sell. If, for example, you sell 100 blooks costing $50 each (whether they were bought by the same person or by several different people), your gains will amount to $250. These earnings are grouped in your pot, which you can view at any time in the page "My Sales" from your account.
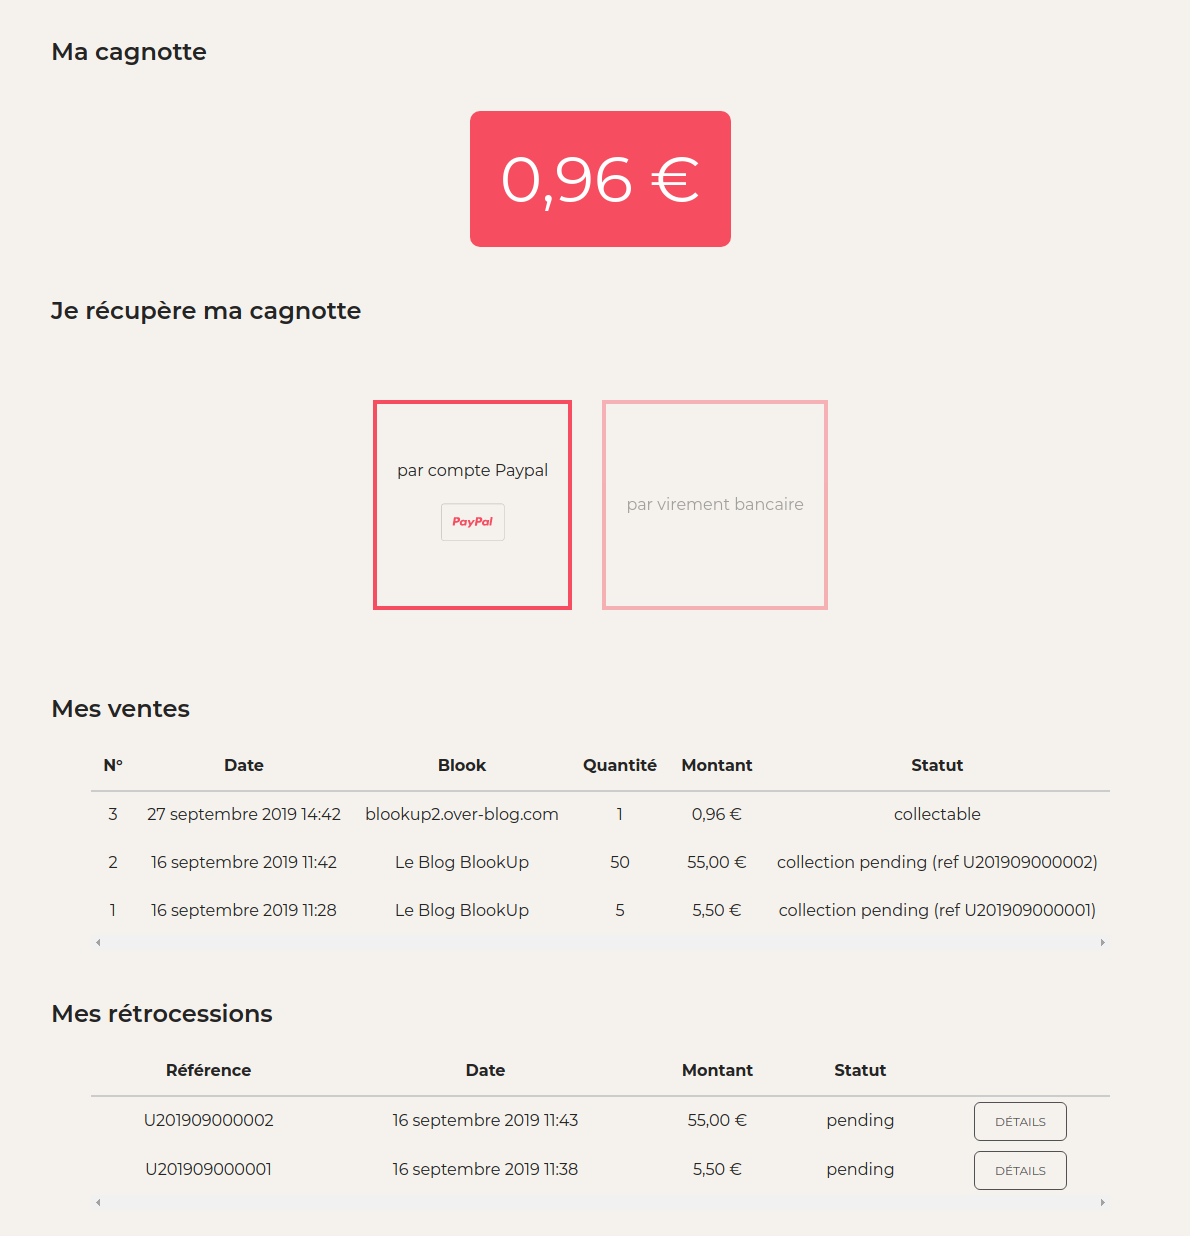
This page also allows you to view the details of your sales and recover the accumulated earnings in your pot via Paypal.